Rabu, 10 Desember 2014

Orange and peach yoghurt cake


Here's sharing with you an easy to prepare, moist and delicious orange flavoured yoghurt cake which I made using my Bosch Maxomixx hand blender set. This simple cake is made with basic baking ingredients that are readily available and it takes no time to whip up.


I topped the cake with peach slices which makes the cake a delightful and refreshing treat that pairs well with a hot cup of tea especially on a cold, gloomy afternoon.


Its sunny disposition brightens up my morning and it is pleasing to the eyes as it is to the palate...


the golden crumbs tastes tangy and sweet while the scent of the orange makes one feels joyful...what a great way to kick start the day.


The batter is prepared using the creaming method, that is, beating butter with sugar to incorporate air into the batter. The batter will turn pale, increase in volume and become light and fluffy. I usually leave the butter to soften in room temperature (which is around 28-30 degC) for 15 to 20mins. During this time, I will gather and prepare the rest of the ingredients. The butter should be firm and easily leaves an imprint when you press a finger into it. It is important not to leave the butter out for too long especially if the weather is hot, if the butter appears greasy or becomes too soft, it will not be able to hold too much air or give as much volume when creamed with sugar. As a result, the cake may not rise that well during baking.


The next step is whisking in the eggs. Patience is key. Add the eggs in several portions and whisk well each time it is added. Adding eggs too much at a time will cause the batter to curdle. Using room temperature eggs will also help to prevent curdling. If the batter starts to curdle, add some flour to the mixture to stop it from curdling. Do not try to continue to whisk a curdled batter as it will make worst.

Due to the 'runny' consistency of beaten eggs, I tend to pour too much eggs into the batter. However, with a hand held whisk, I can prevent curdling as I could easily manoeuvre the whisk over the batter so as to incorporate the eggs a little at a time. The balloon whisk attachment of the Bosch hand blender works like a charm. If the butter is still too cold or too firm, I could use the turbo button or pulse function to beat the mixture as it provides more power. The balloon whisk is also much easier to clean as compared to the paddles of my handheld electric mixer.


The final steps involved whisking in some orange juice and zest, followed by flour and yoghurt. I added the flour alternate with the yoghurt to prevent curdling and also for easier mixing.


The finished batter could fill up slightly more than half the height of my 7 inch round pan.


The cake rose beautifully and the crust baked to a nice golden hue.


The texture of this zesty cake is tender and moist, smells good and is full of orange flavour. Everyone in my family loves it. It is going to be another great add-on to my baking repertoire, something which I will turn to whenever I feel like baking on a whim :)


Orange and Peach Yoghurt Cake

Ingredients:
(makes one 7" cake)

150g unsalted butter, cut into cubes (leave to soften at room temperature for about 15~20mins)
120g caster sugar
2 medium sized eggs, lightly beaten (about 100g without shell)
3 tablespoons orange juice
1 tablespoon orange zest
200g cake flour
1 1/2 teaspoons baking powder
120g plain yoghurt
some canned peach slices

Method:
  • Grease the sides of a 7" round pan with some butter, dust with flour. Line the base with parchment paper, set aside.
  • Cut canned peaches into 8 slices. Rinse, drain and pat dry with paper towel, set aside.
  • Sift cake flour and baking powder together, set aside.
  • Place butter in a mixing bowl. Using the Bosch MaxoMixx hand blender with the whisk attachment, whisk the butter using speed 8 for about 1 minute. Add in the caster sugar, whisk until the batter becomes pale, creamy and fluffy (takes about 2 mins). Stop in between to scrape down the sides of the mixing bowl with a rubber spatula.
  • Add in the beaten eggs in a few separate additions, whisk well each time the eggs is added.
  • Add in the orange juice and orange zest, whisk to combine.
  • Sift in half of the cake flour/baking powder mixture. With a spatula, stir until the flour mixture is incorporated into the batter.
  • Add in the yoghurt, stir with spatula until just incorporated.
  • Sift in the rest of the flour mixture, stir until flour mixture is just incorporated into the batter. Do not over mix. Scrape down the sides and the base of the mixing bowl to make sure there is no residual flour mixture.
  • Pour batter into the prepared pan. Spread and smoothen the top with the spatula. Arrange peach slices on top. 
  • Bake in a pre-heated oven at 180deg for 50-55 mins till the top turns golden brown or until a skewer inserted into the centre of the cake comes out clean.
  • Remove cake from oven, let cool slightly for about 10mins. Run a knife along the sides of the pan (use oven mitten as the pan will still be hot). Invert the pan onto a plate or baking tray. Remove the pan and the parchment paper on the base of the cake. Place cake right side up on a wire rack and leave to cool completely. Dust with icing sugar before serving, optional. The cake can be stored in room temperature for a day, any leftovers can be stored in the fridge, let the cake returns to room temperature before serving.

Jumat, 28 November 2014

just one bowl


I serve this simple rice bowl dish whenever my children are home for lunch especially during the school holidays. It is something that can be put together in a jiffy as my mornings tend to be shorter during this time of the year. We have the luxury to sleep in, unlike during the school terms we do not have to start our day at the crack of dawn.

My children are not fussy when it comes to home-cooked food...they will finish whatever I prepare for them. They like their greens, can take spicy food and have no issues with brown or multi grain rice. It is a different story when it comes to eating out though. When they are given options, they can make things difficult.


The stir-fried pork slices was marinated with ready-made sauce (I used CJ Bibigo Korean bbq marinate and cooking sauces) which makes cooking convenient and quick. While my children like the sweet and savory flavour, I prefer to use a combination of two sauces, its original and hot and spicy sauce for that extra kick. The sauce doesn't make the dish too salty and certainly lends it a better flavour, something which I am (a lousy cook) not able to replicate by using soya sauce, salt or sugar.


From the photo, somehow, the broccoli looks raw, but the florets were actually blanched till fork tender. The open secret to make blanched vegetables stay green is to add some salt to the water that is used to boil the vegetables.

I liked to serve this dish with Gim (laver dried seaweed) a type of crispy, roasted Korean seaweed that goes really well with rice. It is also a great dinner option on days when we would rather have a lighter evening meal, or occasionally when I only have to set the table for two...which I believe will become the norm in time to come...


Minggu, 23 November 2014

fuss free comforting soup


As the weather gets cooler during this rainy season, my thoughts turn to warming stews, porridge and soups. With my kitchen helper the Bosch MaxoMixx hand blender set, I am now able to make thick, creamy soup with great ease.

I have been making this fuss free Pumpkin soup ever since I store the handy MaxoMixx hand blender in my kitchen drawer, alongside with my daily cooking utensils. This handheld device is indeed so much easier to clean, store and retrieve than a stand blender. Besides blending soup, it is very convenient for making smoothies as I can use it to purée fruits right inside the serving cup.


This pumpkin recipe calls for just a few basic ingredients which is readily available at the local supermarkets. The soup is quick and easy to put together with just a few simple steps. To reduce the cooking time, I cut the pumpkin into thin slices instead of cooking them in chunks. The most difficult part of preparing this soup is 'peeling' or removing the skin of the pumpkin (^^!)


It takes only about a couple of minutes to cook the onions and not more than 5 minutes to cook the pumpkin till soft...


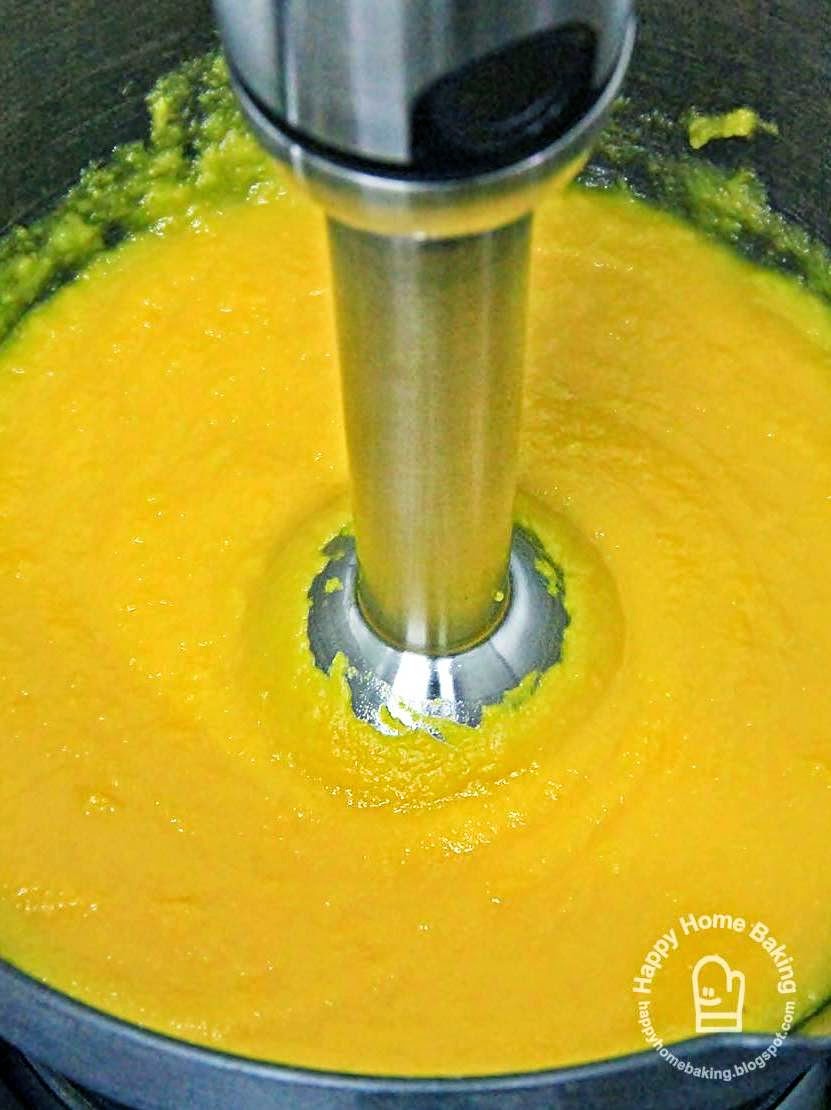
and under a minute to purée the mixture till smooth...


Fresh milk is added to lend it a nice creamy flavour and it is a healthier option than to use thickened cream or double cream.


The soup is ready when it starts to simmer and comes to a full boil. Season with a pinch of salt and some pepper and it is all ready to be served.


This warm and comforting pumpkin soup is really delicious. The soup is thick and yet doesn't taste rich or greasy. Nothing beats a bowl of hearty homemade soup that is pleasing to the palate and enjoyed by both young and old in the family.


Easy Pumpkin Soup

Ingredients:
(serves 2)

600g pumpkin
25g yellow onions, chopped
1 tablespoon oil
1/2 cup water
1 cup fresh milk
pinch of salt
pepper


Method:
  • Peel and deseed pumpkin, cut into thin slices.
  • Heat oil in a large saucepan. Cook the chopped onions on low heat for about 1 to 2 mins, until soft. 
  • Add the sliced pumpkins and give it a few quick stir. Add in the water and bring to a boil. Leave to simmer for about 5 mins, stirring occasionally until the pumpkin turns soft.
  • Turn off the heat. Using the Bosch MaxoMixx hand blender, purée the pumpkin using speed 4 until the mixture becomes well blended. 
  • Turn to medium-low heat and add in the milk, stir to combine. Bring to a boil and season with salt and pepper. Serve with croutons or pumpkin seeds or crusty bread.

Jumat, 14 November 2014

Apricot Soufflé Cheesecake


Whenever I start harboring thoughts of giving up blogging altogether, all I needed to do was to try something new(to me)...be it a new ingredient, a new baking method or a new recipe.


I happened to come across this Apricot Soufflé Cheesecake recipe from a cookbook which I borrowed from the library(the second time) and somehow it caught my attention this time...I have no memories of it when I first borrowed the same book a couple of years back (^^")


There is nothing new in this recipe...there is no new ingredients since I have already tried baking with apricots. There is no new baking method involved as the preparation is similar to baking a chiffon cake. The only new things I could think of is the combination of apricots with cheesecake, and baking cheesecakes in ramekins.

The cheesecake rose beautifully, well above the rims of the ramekins while they were in the oven. They started sinking as I left them to cool. I wonder, if I had given each of them a bang on the table when they were right out of the oven, would it help to prevent them from sinking that much?


It is stated in the cookbook that this dessert is best served before the cake starts shrinking and sinking, which means it is best served warm or almost immediately when it comes out of the oven, just like a soufflé. I didn't have the chance to sample the cake while they were still all puffed up. By the time I was done taking pictures, the cakes were well sunken. Nevertheless, the texture was still soft, fluffy and moist. I offered one to my younger child and he ate it in silence. We were not on speaking terms that day as he felt that it was unreasonable of me to scold him for not taking care of his things ;( Anyway, he devoured the cake in no time and I noticed him licking up the crumbs from the ramekin. Under normal circumstances, he would have asked for a second helping. I broke the silence and offered him another serving. He gladly took it and enjoyed the very last crumb, still in silence.

I kept the leftovers in the fridge for my elder child. When left to chill over night, the texture became rather dense, tasted rich and quite similar to a new york style cheese cake. I personally prefer the lighter version but my younger child liked both.

If you are keen to give this a try, I would suggest to use fresh apricots instead of canned ones. The canned apricots I bought was a tad too sour for my liking. I think to replace the apricots with peach slices or even strawberries would be a delightful variation as well.


Apricot Soufflé Cheesecake

Ingredients:
(makes 8)

250g cream cheese,  cut into cubes, room temperature
30g caster sugar
30g butter, room temperature
2 egg yolks
1 teaspoon vanilla bean paste or pure vanilla extract (optional)
45g cake flour
100ml milk

2 egg whites
50g caster sugar

8 apricot halves, canned or fresh
some extra butter for greasing
some icing sugar for dusting


Method:
  • Preheat oven to 170 degC.
  • Grease 8 ramekins with some butter, set aside (size of ramekin: diameter 9cm, height 5cm).
  • Sieve cake flour, set aside.
  • Wash canned apricots halves (to remove the syrup), drain and set aside. If using fresh apricots, use a knife to cut around the fruit, break into halves and remove the pit. Wash, drain and set aside. 
  • With an electric whisk or stand mixer, beat cream cheese in a mixing bowl until smooth. Add in the caster sugar and beat till smooth, stop to scrape down sides of bowl when needed. Add in the butter, beat till smooth.
  • Add in the egg yolks gradually and beat till incorporated. Beat in the vanilla bean paste or vanilla extract, if using.
  • Add half the amount of flour, beat till incorporated. Add half the amount of milk, beat till incorporated. Repeat with the remaining flour followed by the remaining milk. (Note: when beating in the milk, the batter may form small lumps initially, continue to beat and the lumps will dissolve. Alternatively, add in the milk gradually as you beat to avoid lumps from forming.)
  • In a clean, dry mixing bowl, beat egg whites with an electric whisk on low speed until mixture becomes frothy and foamy. Add half of the sugar and turn to medium-high speed and beat the mixture. Continue to add in the remaining sugar mixture in separate additions and beat until the egg whites reaches the soft peak stage.The soft peak stage is reached when the peaks of the whites curl over and droop slightly. Turn to low speed and beat for another 1 to 2 mins (this helps to stabilise the air bubbles).
  • Add the beaten egg whites to the cream cheese mixture in 2 separate additions, each time fold with a rubber spatula (I prefer to use a balloon whisk) until just blended.
  • Pour batter into the prepared ramekins till 80% full. Place ramekins in a baking tray.
  • Place on middle rack of the oven and bake for 20 mins. (Note: the top may start to crack, but it is perfectly alright.)
  • Remove ramekins from oven and top each ramekin with an apricot halve. Return ramekins into oven and continue to bake for another 15 to 20mins until golden brown.
  • Remove from oven and leave to cool slightly. Dust with icing sugar, optional. For light fluffy texture, serve immediately. Alternatively, for a dense cheesecake texture, leave to cool completely and chill in the fridge for about 2 to 3 hours, best overnight, before serving.
Recipe source: adapted from 起司蛋糕,信太康代

Minggu, 09 November 2014

luncheon meat buns

I have not been able to update my blog recently as I was caught up working on the itinerary for our year end holidays. After weeks of googling the internet, reading travel reviews, guidebooks and scrutinising google maps, I have finally settled the accommodations, car rental and even bought the travel insurance for our trip. I just need to tie up some loose ends and work on the minor details. I hope I am able to get back to blogging and update with a few more posts before we leave for our holidays.


I made these tangzhong bread buns quite some time back...


I couldn't help but to share it although they are nothing fancy...just ordinary bread buns wrapped with one of my childhood favourites...canned luncheon meat ;)


Beside shaping them into the usual round buns, I have also wrapped some with thick slices of luncheon meat, yum!

One plus point about using luncheon meat as fillings for homemade buns is that there is no preparation required other than slicing or mashing the luncheon meat.


I am becoming a die hard fan of tang zhong(water roux) bread dough as I find the recipe rather straight forward especially if you use a bread machine or a stand mixer to knead the dough. Bread buns made with tang zhong method do keep well and the texture remains soft even after a couple of days. Besides luncheon meat, this bread dough recipe is great for any other type of savoury fillings such as char siew,  sardines or curry potato buns. The next time I were to made these again, I will put in a little extra effort to use a mixture of luncheon meat and mashed potatoes as fillings :)


Luncheon Meat Bread Buns (午餐肉小餐包)

Ingredients:
(makes 12)

for the buns:
tang zhong (water-roux):
20g bread flour
100ml water

bread dough:
195g bread flour
90g cake flour
12g milk powder
30g caster sugar
6g salt
6g instant yeast

60g egg, lightly beaten
65g water
75g tang zhong (water-roux)

45g unsalted butter

for the fillings:
some mashed (or sliced) luncheon meat


Method:

to make tang zhong:
* Place 20g bread flour in a saucepan. Add 100ml water, mix with a hand whisk till smooth, making sure there are no lumps of flour. Cook over medium to low heat, stirring constantly with the hand whisk to prevent it from burning. Within 1 to 2 mins, the mixture will start to thicken, stop when you see traces in the mixture for every stir you make with the hand whisk. The tang zhong is ready. Immediately transfer the hot tang zhong into a bowl and cover it with a cling wrap, making sure the cling wrap sticks onto the surface of the mixture. This is to prevent a film from forming on the surface. Leave to cool completely before using it.

to make the bread dough:
* Place bread flour, cake flour, milk powder, sugar, salt, yeast, egg, water and tang zhong (use 75g) in the mixing bowl of a stand mixer. Let the mixer knead the dough on high speed until the ingredients come together to form a dough, takes about 8 to 10 mins. Add in the butter and continue to knead for another 15~20mins until the dough becomes smooth and elastic. (Upon adding the butter, the dough will become very wet/slack again, add some flour if it remains slack after 10 mins of kneading. Depending on the type of flour used, the dough may still stick to the sides of the mixing bowl after 15-20mins of kneading. If this happens, continue to knead for another 5mins or so, stop the machine, oil or dust hands with flour and proceed to remove the dough from the bowl.

* Place dough in a lightly greased (use vegetable oil or butter) mixing bowl, cover with cling wrap or a damp cloth and let proof in room temperature (around 28 to 30 degC) for about one hour, or until double in bulk.

* Remove the dough from the bowl and give a few light kneading to press out the gas in the dough. Divide the dough into 12 equal portions (about 45g each). Roll each dough into smooth rounds, cover with a damp cloth or cling wrap and let the doughs rest for 10mins.

* On a lightly floured work surface, flatten each dough into a round disc. Press out any trapped air as you flatten the dough. Wrap each dough with one heaped tablespoon of mashed luncheon meat. Pinch and seal the seam tightly. If using sliced luncheon meat, roll dough to form a longish oval shape. Wrap dough with sliced luncheon meat, pinch and seal the seam tightly.

* Place seam side down on a greased (or lined with parchment paper) baking tray. Space doughs two inches apart to allow them to expand. Cover with damp cloth or cling wrap and leave doughs to proof for the second time for about 40mins, or until double in size.

* Bake in pre-heated oven at 180 deg C for 12 to 15 mins or until golden brown (if necessary, tent the surface with foil if the top browns too quickly closer to the baking time). Remove from oven and transfer to wire track to let cool. Once cool, store immediately in an airtight container.

Recipe source: 65度C汤种面包, 陈郁芬

Kamis, 16 Oktober 2014

Almond Snowball Cookies


These Almond Snowball Cookies are one of the easiest homemade goodies I have ever made!


Instead of the usual way of beating butter and sugar with an electric beater, the cookies are made using my Bosch MaxoMixx hand blender set. Simply place flour, sugar, salt, ground almond and diced butter into the chopper set, process the mixture into fine crumb (within 10 seconds),


transfer to a mixing bowl, add in some vanilla extract and mix it into the crumbs. The mixture is on the dry side as there is no liquid added (other than the 1 teaspoon of vanilla extract), as such, you will need to gather, press and squeeze the crumbs together to form the dough. This can easily be done within a minute of two, manually by hand.


The technique to form these cookies balls is once again, to press or squeeze the dough in your palm before rolling and smoothing it into round balls. Children will have fun making these ;)


The cookies are baked at 160 degC,  a much lower temperature than the norm of 180 degC, as the doughs may crack too much if the temperature is too high.


The recipe uses a lot less butter than most cookies, yet, they still produce a nice buttery flavour :)


The texture of these cute morsels is slightly soft and crumbly, somewhere between crunchy cookies and melting moments. They are delightful treats to go with an afternoon cup of tea, and of course, they can be enjoyed any time of the day :)


Almond Snowball Cookies

Ingredients:
(makes 18 cookies)

120g cake flour
40g caster sugar
1/2 teaspoon salt
50g ground almond
50g unsalted butter, cold, diced into small cubes
1 teaspoon pure vanilla extract

icing sugar for dusting


Method:
  • Preheat oven to 160deg C.
  • Place cake flour, caster sugar, salt, ground almond followed by the diced unsalted butter in the container of the Bosch MaxoMixx XL chopper. Process using Speed 4 for 15 seconds until the mixture resembles fine crumbs.
  • Transfer the mixture to a mixing bowl. Add pure vanilla extract and mix with a spatula. Gather and press the mixture together with hand to form a dough.
  • Divide dough into 15g portions, press, roll and smooth each portion into round balls. Place on baking tray lined with parchment paper.
  • Place at middle rack of the oven and bake at 160degC for 15 to 18mins until the cookies are lightly browned.
  • Leave to cool on wire rack. Dust with icing sugar and store in air-tight container.


Rabu, 17 September 2014

my new multi-tasker

I have always viewed a food processor or a stand blender an unnecessary gadget in my kitchen. The simple everyday meals that I dish up would never require one. Storage and cleaning is another reason that makes me think twice before investing in another kitchen must-haves.

Just like what happened previously with the Bosch MUM5PRO HomeProfessional Kitchen Machine MUM57830, when Bosch invited me to participate in the review of their latest Bosch MaxoMixx MSM87180 hand blender set, I was hesitant to accept the invitation. In fact I almost turn down the offer as I don't think I am able to come up with any decent recipe that requires the use of a hand blender. It was only after looking through the various features how this hand blender could also be used for preparing desserts and cakes that I decided to take up the challenge. I definitely have more confidence in my baking than cooking skill ;)


When I opened up the box of the complimentary set of the MaxoMixx hand blender, I knew I had made the right decision to participate in this review and recipes exercise. The MaxoMixx is more than a hand blender, in fact it is a multi-functional tool that can perform various operations from blending to whisking, chopping, mincing, shredding and grating. The set comes with a detachable stainless steel blender foot for puree, blend and chop ingredients, a stainless steel beating whisk for whisking egg whites and cream, two different sized chopping device with stainless steel blades, an ice-crush blade and a blending jug.

two stainless steel cutting blades and ice crush blades
blending jug with calibration

With the interchangeable and detachable attachments and accessories, the device can easily be transformed from an immersion blender to an electric whisk or a handy food processor to chop herbs, onions, meat, nuts, chocolate and cheese. These features are great not only for preparing meals but they are also applicable to the preparation process of cake and desserts making.


12 speed dial at the head end for easy setting

ergonomic design handle

The blender is equipped with a 12 speed setting, 750 watt of power to allow various kinds of applications. The turbo button or pulse function for maximum performance is very useful for that extra quick blitz. The non-slip, soft touch handle and large buttons on the base unit provide comfortable and safe handling. The eject button allows ease in detaching and clicking on the attachments.


Another safety feature is that both choppers are fitted with either non-slip base or rubber suction feet to provide extra stability. The attachments and accessories, except the base unit and gear attachments, are dishwasher safe. Both the stainless steel blender foot and whisk are easy to clean and there is no worry of stubborn food stains over time or after processing vegetables such as carrots or beetroots.


The robust and high quality stainless steel blender foot allows it to be used directly in hot pots without the worry of damaging the device. It also saves the trouble of having to transfer hot soup from the pot to a stand blender and then back to the pot again. The device is easy to maneuver and there is control over how fine I wish to blend or puree the ingredients since I can stop as and when to check. I didn't take more than a minute to puree the pumpkins into a pot of velvety smooth goodness.

The length of the blender foot is long enough for most deep pans and pots. It can be placed inside the accompanying blending jug for making smoothies and puree fruits. In fact, it can also be used to mash ingredients directly in suitable cups, bowls or containers.

As the blender foot is detachable, I can store the base unit, blender foot and whisk in my kitchen drawers for easy retrieval for my daily use.


pardon my poor photography skills, the actual size of the balloon whisk is much smaller than what it appears in this picture.

Next, I tested the balloon whisk attachment. The balloon whisk is quite small compared to my hand whisk. I have doubts whether it could provide the same results as my old and trusty electric handheld mixer.


I used the whisk to prepare my all time favourite Fruit Pastry Cake which yields a rather thick batter. Surprisingly, the small balloon whisk could work through the thick batter with ease even though I only set it to speed 4.


The two choppers come in handy for chopping nuts and dried fruits, grating chocolates and for turning oreo cookies into crumbs. This really helps cut down preparation time especially whenever I am in a rush or when I am on a bake-on-a-whim mood.  The processed ingredients can be covered with the lids and stored until when ready to use, a very thoughtful design indeed.


The chopper can even be used to cut cold butter into flour for making small batch of scones, cookies and pie crusts. It takes the manual work away from having to rub butter with fingertips or a fork and the worries of the butter melting away during the process.

So far the Bosch MaxoMixx proofs to be a multi-functional and very versatile tool that helps to reduce time and effort when preparing an entire meal from appetisers to desserts. I am very satisfied with the overall performance as it is able to meet my cooking and baking demands. The only down side is that for optimum use, the ice crush blade could only crush a few ice cubes at a time. The other thing that probably only affects me is that besides the base unit, the gear attachments cannot be immersed in water or even cleaned in running water, it can only be wiped with a damp cloth. (Update: I was informed by Bosh that the reason for advising consumers against washing the gear attachments is that there is food safe grease in the gear which would help to protect the usage lifespan of the product and ensure the quality of performance. This applies to many other products in the market as well.) 

After using the MaxoMixx, I have completely changed my opinions of a blender or food processor as an essential kitchen appliance. I am looking forward to prepare sauces, chili pastes, potage, smoothies and milk shakes and all those dishes and desserts that I wouldn't think of dishing up without such a handy kitchen device.

Do look out for my blog updates in the coming months as I will be sharing recipes prepared using the MaxoMixx blender.


PS: 'The ergonomic MaxoMixx hand blender from Bosch has been awarded the Red Dot Award: Product Design 2014. Made up of 40 international experts, the largest-ever Red Dot jury for the 2014 awards, delivered the following appraisal on the Bosch MaxoMixx hand blender, "With its dynamic form and optimal ergonomics, this mixer meets the demands of a modern kitchen appliance." This prestigious win adds on to the growing list of Bosch household appliances that have been similarly honoured with the coveted title - the Bosch MUM5 Kitchen Machine was awarded in 2011.'

This is not a paid review but I was provided with a set of the Bosch MaxoMixx MSM87180 hand blender for my use when I participated in their review and recipes exercise. The opinions expressed here are mine and mine alone.