Tampilkan postingan dengan label CNY. Tampilkan semua postingan

Minggu, 22 Januari 2012

Festive Bakes

Here's the last installment of festive bakes, just in time to usher in the Lunar New Year!


I baked these Peanut Cookies on Saturday night, just a day before the lunar new year eve. These peanut cookies have been on my baking list every year. Not only they are simple to put together, it is also one my kids' favourite cookies.


I followed the same recipe from here. However, instead of grinding the peanuts, I bought ready-made peanut powder. I really like the creamy and slightly crunchy texture.


I have already lost count how many times I have baked these melt-in-mouth german cookies! I have made chocolate flavour, green tea flavour, duo or marbled version...and the latest, I added mini chocolate chips (I used 50g) into the batter. The cookies taste awesome! The semi-sweet chocolate chips greatly enhanced the taste of the cookies and the best thing is, the melt-in-the-mouth texture is not affected at all.


Here's wishing all of you a Happy Lunar New Year!

祝愿您在新的一年里,
一帆风顺,二龙腾飞,三羊开泰,四季平安,
五福临门,六六大顺,七星高照,八方来财,九九同心
十全十美,百事亨通,千事吉祥,万事如意!

Sabtu, 21 Januari 2012

Little effort yields great result

On my very first trip to the library once we came back from our trip, I zoomed in for books that are on Chinese New Year cookies or traditional asian type of cookies. I only managed to get hold of two books...and after going through the books back and forth, back and forth a few times, I could only settle on one single recipe...Cranberry Cornflakes Cookies, 蔓越莓酥饼. No, it is not the popular recipe among Chinese bloggers which originates from the book 孟老师的100道手工饼干. Rather, it is a book published by a Malaysian author, with the title,做小饼赚大钱.


Translated as Little Cookies Earn Big $, it is no wonder that the recipe yields so many cookies in just one batch. I got 77pcs of cookies out of half a block of butter. They are also very simple to put together, all you need is a mixing bowl and a manual whisk (I hardly use my old-enough-to-go-to-the-museum handheld electric whisk, as I find washing the paddles free of any oil/fat a taunting task!).

Making these cookies was really an uneventful affair, the steps are so straight forward that anyone can make them without batting an eyelid. The only highlight was, when I poured the crushed corn flakes into the mixing bowl, I was hit right in the face with this very very nice aroma. I am never a fan of cereals...I didn't grow up having a bowl of cereals with milk for breakfast. Believe it or not, I only got to taste my first bowl of cornflakes with milk in a business hotel when I first started travelling for work. This is the first time I baked something using corn flakes. I was pleasantly surprised that crushed cornflakes gives off such a nice fragrant...pardon my lousy expressions I can't describe it in words...but I thought there was even a hint of 'milky' aroma in the air. I couldn't help but to check the cereal box once I got everything done. I have never known that cornflakes are made with cornmeals! What can I say? But never a day has gone by without me learning something new!


Of course I doubt you will be able to earn big money if you were to sell them...what matters most is, a little effort could yield such great result. These little morsels have got a delicious buttery flavour...the cornflakes gives a nice crunch, and the cranberries provides a very nice sweet, tangy taste. Trust me, you won't be able to stop at just one. The only downside of this recipe is that it requires two egg yolks...but I have no problem with extra whites since I can save them for chiffon cakes. This is certainly going into my Chinese New Year cookies list, and I would make them anytime of the year :)


Cranberry Cornflakes Cookies

Ingredients:
(makes 77~80 pcs)

120g Unsalted butter, cut into cubes, soften at room temperature
pinch of salt
50g icing sugar
2 egg yolks, lightly beaten
135g plain flour
30g corn flour
100g plain corn flakes, coarsely crushed
80g dried cranberries, cut into smaller pieces

Method:
  1. Place corn flakes in a plastic bag. Crush them with your fingers into smaller pieces, do not crush too finely. Set aside.
  2. Cut dried cranberries into smaller pieces (I used a kitchen scissor). Set aside.
  3. Place unsalted butter, salt in a mixing bowl. Sift over the icing sugar (do not skip this step, this is to remove any lumps in the icing sugar). With a manual whisk or a wooden spoon (or an electric whisk), beat the butter, salt and icing sugar till the mixture turns pale.
  4. Whisk as you dribble in the egg yolks, whisk till combine.
  5. Sift over plain flour and corn flour. With a spatula, fold the mixture until the flour is incorporated.
  6. Add in cornflakes and dried cranberries. Mix with spatula (or use hand) till just combined.
  7. Arrange mini paper liners, evenly spaced, on a baking tray.
  8. Measure 7g doughs and place each into a mini paper liner. (Note: it is not necessary to shape the dough into a smooth round ball, just roughly gather it into a lump. These cookies can be baked without using paper liners, arrange them evenly spaced on a baking tray lined with parchment paper. They don't expand much upon baking.)
  9. Bake in preheated oven at 140degC for about 25 minutes until lightly golden. (Note: all ovens behave differently, do keep a close watch near 20mins of baking time to prevent the cookies from over browning. Turn the tray around half way, when necessary.)
  10. Remove from oven and transfer to a cooling rack, leave to cool completely before storing in air tight containers. (Note: when the cookies are still warm, the cornflakes may taste a little chewy/soft, but it will turn crispy upon cooling.)
Recipe Source: Little Cookies Earn Big $

Kamis, 19 Januari 2012

for the love of making cookies...

I love baking cookies...but not so much in eating them. Chinese New Year is just about the only time of the year when I actually enjoy both baking and eating them ;)

The first runner up on my cookies-making marathon is none other than these Pineapple Tarts.


I have a love-hate relationship with these Chinese New Year must-haves. Only those who have made them from scratch, all done single-handedly, from cutting the pineapples to washing up, to eventually packed these priceless morsels into containers will fully understand what I mean. Ok, I didn't do every single bit by myself, my not-so-reliable kitchen assistant did stop by to help me with the final touches just minutes before the cookies went into the oven ;)


I was almost half-dead after making the pineapple jam, not forgetting the minor cuts on my fingers as a result of being over zealous when grating the pineapples! It took me about 45mins to an hour to cook the jam. The time taken would have been longer, but I stopped when the jam 'appeared' to be fully dried up. Actually the jam was quite soft...it would be better to continue to cook it longer, but I worried I would burnt the whole pot of jam. I rather work with soft jam than to jeopardise a whole afternoon's hard work!


After spending 2 hours working non-stop, I completed two trays of pineapple tarts, just a mere 40 tangerine style ones and 30 open tarts. I actually suffered from a bad headache after making them...and had to resort to panadol and a medicated rub on my shoulders before I crept into bed that night. If you were to ask me now, I will tell you, No, I am not going to make them again, never! I have already developed a pineapple tarts phobia!


I told my cyberfriend VB, if she ever wants to make these, do make them only for herself, or only give them to someone who has baking experience or at least someone who has made cookies from scratch. I believe they are the ones who are able to appreciate your labour of love. Seriously, when it comes to pineapple tarts, everyone has got their own preferences...some prefers melt in the mouth texture, some prefers the jam fibre to be coarse, not too sweet not too sour...some even asking for pastries that could hold up nicely that doesn't crumble in your hands but only in your mouth, blah, blah, blah. It is too difficult to please each and everyone's taste buds. I don't know about you, I will be very very moody, if I hear the slightest, undesired comments about the pineapple tarts I made...


I am lucky that I found a cake friend, she is the first person whom I have this "相逢恨晚" feelings (loosely translated as...it's a regret that we met each other so late). These pineapple tarts are made especially for her as I suspected she doesn't make them, at least, she has never mentioned it to me.  I have wanted to tell her, only tell me if the pineapple tarts are nice, even if it doesn't suit her taste, I don't mind a white lie ;) But as usual, I forget about it when we started to engage in a hot topic...that is, about our kids' academic studies!


Anyway, I don't know whether it was a white lie, but my friend came back with good comments. It was certainly a pleasure to hear that she was able to mention things like..."there is no buttery aftertaste...did you use Lurpak? and I thought I tasted vanilla, did you add vanilla extract?" Even though I felt sheepish when she mentioned that she tasted some pineapple fibres, but she said it gets to show that everything is homemade from scratch (^^'). I guess for all homebakers, especially self taught ones, these are sincere comments that we treasure, it is through sharing that we would be able to improve our baking skills.

I hope you have also found yourself a cake friend, someone who can share your bakes and experience with each other :)


Pineapple Tarts

Pineapple Jam:
Ingredients:
(yields about 450g jam)

2 half ripened pineapples (use Sarawak pineapples)
250g granulated sugar (use between 200g to 300g, adjust according to taste)
1 cinnamons stick (about 5cm)
4 cloves

Method:

  1. Remove the skin on the pineapples (choose half ripened ones as fully ripened pineapples will be difficult to grate and unripe ones will be too sour). Cut away the 'eyes'. Cut the pineapples (lengthwise) into 4 quarters. Grate the pineapples.
  2. Drain the grated pineapples, press out the juice with the back of a spoon. Reserve the pineapple juice.
  3. Place grated pineapples, cinnamon stick, cloves, and half the amount of sugar in a pot (I used a stainless steel pot with a heavy base). Bring to a boil. Turn to medium heat and let it continue to simmer. Stir occasionally. When the mixture starts to dry up, add in a few tablespoons of the reserved pineapple juice. Continue to let it simmer. Keep adding the pineapple juice as the mixture dries up. Continue till all the pineapple juice is used up.
  4. Add in the remaining sugar gradually (a few tablespoons at a time), and keep stirring as the mixture dries up. Adjust amount of sugar according to taste.
  5. Turn to LOW heat, keep stirring the mixture until the jam caramelised, becomes sticky and dry. Total cooking time is about 1 hour or longer. Leave to cool and place in air tight container and store in fridge. 
  6. When ready, roll pineapple jam into 6g balls (about 1 teaspoon). Store covered in fridge until ready to use. 


Pastry:
Ingredients:
(portion is enough to make 70 tarts)

8oz (227g) Unsalted butter, cut into chunks, soften at room temperature
50g icing sugar
2 egg yolks, lightly beaten
1 teaspoon vanilla extract (I used Nielsen-Massey pure vanilla extract)
14oz (396g) plain flour
1/2 teaspoon salt


Method:
  1. Place butter (I used unsalted Lurpak)  in a mixing bowl. Sift over the icing sugar. With an electric mixer, on medium speed, cream butter and icing sugar till the mixture turns pale. Add in salt, whisk to combine.
  2. Add in the vanilla extract and whisk to combine.
  3. Dribble in the egg yolks and continue to whisk the mixture till fully incorporated.
  4. Sift flour into the mixture. Mix the mixture with your hand and lightly knead for a couple of minutes till the flour is incorporated into the dough (do not over work the dough).
  5. Wrap the dough with cling wrap and chill in the fridge for about 30mins. (This will prevent the dough from spreading upon baking, and also makes it easier to handle.)
  6. For Tangerine style: Divide dough into 10g each. Flatten each dough into a small disc and wrap with a pineapple jam. Top with a clove. Place on baking tray lined with parchment paper. (Note: If the jam is too soft, it will be difficult to wrap. To overcome this problem, freeze the rolled jam balls in the freezer for about 30mins, or longer, before wrapping. Watch this video to learn the method to wrap the tarts.)
  7. For Open tarts: Roll out a portion of the dough (it is easier to work in smaller portions) between two plastic sheets to about 5~7mm thick. (The plastic sheets help to prevent dough from sticking to the rolling pin and work surface.) Cut out the dough with the tart mould and transfer to baking tray, lined with parchment paper. (To get very clear imprints, place both the outer ring and the inner piece of the mould on the roll out dough. Press the outer ring into the dough then push down the inner piece with some force. Lift up the mould and carefully remove the cut out dough which is stuck to the mould. Dust the mould with flour regularly for easy release.) Place pineapple jam balls on each cut out dough. To decorate, top it with a tiny ball of dough or cut out thin strips of dough and lay over the top of the pineapple paste. (Note: I omit the egg wash for both tangerine style and open tarts.)
  8. Bake in preheated oven at 170 degC for 15 mins. Leave to cool on baking tray for a few minutes before transferring to wire rack. Let cool before storing in air-tight containers.

Minggu, 15 Januari 2012

Set the ball rolling

It is the time of the year again when I will go on a cookie baking frenzy!


I kicked start my Chinese New Year cookie baking marathon with a batch of green tea snowballs. Upon my cyberfriend, VB's recommendation (see her lovely creation here), I first attempted to make these snowball cookies following the recipe from Daily Delicious, one of my favourite food bloggers.

Before I actually made them, I causally mentioned it to my cake friend that I am planning to make some snowballs...just the name itself got her interested. I didn't even show her the link to the recipe, as my intention was to share baking tips with her only after I have tested it out. Yet she was inspired enough to google for the recipe ;)  She came back to inform me that she has found two similar recipes, one from Daily Delicious (who can miss her gorgeous Little Balls of Happiness?!) and one posted by Wendy of My Buttery Fingers. The main difference between the two recipes is, one uses egg white while the other doesn't. My cake friend decided to try out Wendy's recipe, just like me, she doesn't know what to do with a left over egg yolk. It was great news to me, as I could hear her reviews before deciding which recipe to go for. I suggested to her that may be she could add a pinch of baking powder since Wendy mentioned that her cookies flattened a little upon baking. Well, it seems that the baking powder didn't make much of a difference after all...


My attempt with Daily Delicious green tea snowballs was not an instant success. No, there is nothing wrong with the recipe, the only thing I did wrong was that I didn't keep a close watch over the cookies while they were baking in the oven. It turns out that my oven was too hot (I used the fan mode), and the cookies were overly browned even before the baking time was up :'(

I have actually planned to bake them for my friends, luckily it was a test batch!

So, back to the drawing board again...I struggled between going back to the same recipe and the one from My Buttery Fingers. In the end, I decided to try out Wendy's recipe as I don't want to have any left over egg yolk again. With the experience from the first batch of snowballs, I was diligent enough to keep a close guard while the cookies were baking...no more over browning, yeah!


Taste wise, both cookies are almost similar, but since more green tea powder is used in Wendy's recipe, the green tea fragrant is more prominent. The fragrance from the almond powder is another bonus! The chocolate version tastes good too, the extra icing sugar makes them less bitter since I used unsweetened cocoa powder. As for the texture, both doesn't melt in the mouth...rather they are in between crunchy and melt in the mouth. The cookies made with Wendy's recipe are softer, probably because there is no egg white used. If you were to ask me, both are good recipes, but I would stick to Wendy's recipe simply because it calls for less ingredients.


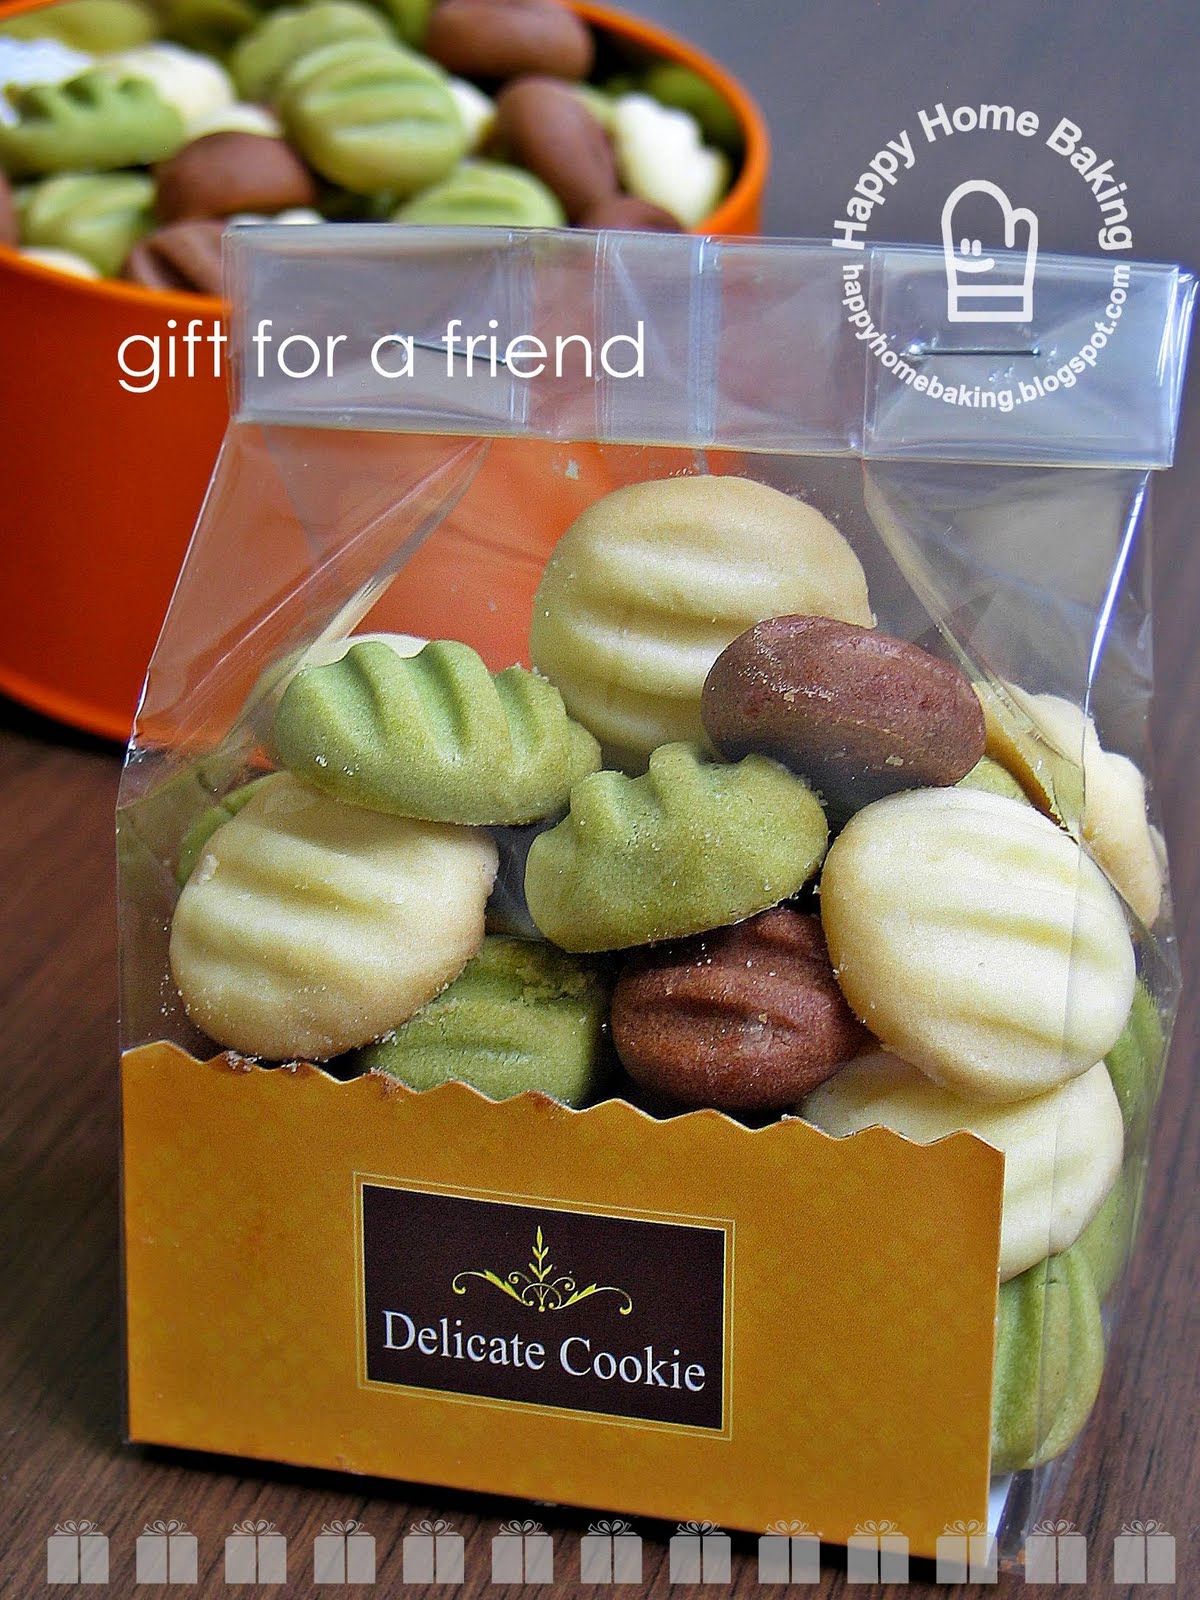
Besides the snowballs cookies, I have also made marbled Melt-in-the mouth German Cookies for my friends...whom I've known for the past 15~19 years.

My cookies were all packed inside these lovely milk cartoon gift boxes which I happened to chance upon them at a neighbourhood gift shop...


Of course, the cookies I made have a very short shelf life...but I believe our friendship does not come with an expiry date. I do hope my friends will like the cookies as much as I enjoy making them, for them :)


Green Tea and Chocolate Snowballs
(抹茶,可可雪球)


Ingredients:
(makes 35)

90g Unsalted butter, cut into cubes, soften at room temperature
a pinch of salt
30g icing sugar
50g ground almonds (almond powder)
100g cake flour
6g green tea/matcha powder
10g cocoa powder (I used unsweetened, Ghirardelli)

extra icing sugar, for dusting

Method:

  1. Toast almond powder at 100 degC for 10 mins. Stirring in between. Let cool completely before using.
  2. Place butter, salt in a mixing bowl. Sift over the icing sugar (do not skip this step, this is to remove any lumps in the icing sugar). With a manual whisk or a wooden spoon (or an electric whisk), beat the butter, salt and icing sugar till the mixture turns pale.
  3. Add almond powder, whisk to combine.
  4. Sift over the cake flour. With a spatula, fold the mixture until just combined.
  5. Divide the dough into two portions (about 125g per portion). Mix green tea powder into one portion, and cocoa powder into the other portion. (Note the dough will be quite soft and sticky.)
  6. Wrap the two doughs separately with cling wrap and leave to chill in the fridge for about 30 minutes. (Note: if left to chill for a longer time, the dough will turn hard. Leave it at room temperature for about 5~10mins to soften before working on it.)
  7. Working with one portion of the dough at a time, measure 8g of dough and shape into balls. Place shaped doughs evenly spaced on baking tray lined with parchment paper, avoid the edges  of the tray as they tend to brown too quickly. These cookies do not expand much upon baking. (Note: the dough soften easily especially in warm and humid weather, so work as quickly as possible. If there is space available, leave the tray of shaped balls to chill in the fridge before proceeding with the other portion. This is to help prevent the shaped doughs from flattening too much upon baking.)
  8. Repeat the same with the second portion of the dough.
  9. Bake in preheated oven at 170degC for about 20-25 minutes until lightly browned. (Note: all ovens behave differently, do keep a close watch near 15mins of baking time to prevent the cookies from over browning. Turn the tray around half way, when necessary. If your oven only allows baking one tray at a time, leave the other tray of shaped doughs in the fridge, or only start working with the second portion while the first tray is baking in the oven. This is to help prevent the shaped doughs from flattening too much upon baking.)
  10. Remove from oven. Let cool for a couple of minutes in the tray before transferring to a cooling rack. While the cookies are still warm, dust them with icing sugar. When thoroughly cool, dust again with icing sugar. (alternatively, leave the cookies to cool completely, coat the surface with icing sugar.) Store in air tight container.
Recipe Source: My Buttery Fingers

Rabu, 25 Mei 2011

Journey down the baking trail: Cookies

I am moving an inch at a time on my baking trail. I have not been baking much for the past few weeks...was busy catching up with things that I have left behind...like watching tv drama and keeping up with the household chores.


I have been wanting to make these melt-in-the-mouth German cookies when I first saw it at my baking pal, Sherlyn's blog. I bought the bag of potato starch weeks ago, but it was on a spurt of the moment that I decided to bake them...even though I was recovering from a fever. My younger son as usual, was always keen and eager to help me with baking, and lately he is into cooking. I have to thank him for being a very caring child. Besides gladly playing nurse, he was very spontaneous in helping out with simple chores when I was sick.

It was a hot and humid evening when we went about whisking the butter and the sugar. After adding the flour mixture, we couldn't really form a dough...the mixture was still batter-like instead of doughy. I was certain that I didn't get the measurement wrong. The only thing I could pin-point was the additional one teaspoon of vanilla extract I added in. It could also be due to the weather, the room temperature was 31.5 degC...the butter was already very soft to the extend of appearing greasy when I was done with the mise en place...and there was nothing much to prepare since there were only 4 ingredients!

I decided to let the dough chill in the fridge and it was a good thing I did. We could finally form the mixture into cookie doughs. Due to the extreme heat, the dough started to soften as we continued to work them into small rounds. I was expecting the cookies to spread upon baking but all of them turn out well. The cookies were nicely baked...slightly pale on top but the bottoms were lightly browned. These delicate cookies certainly live up to the name...the buttery crumbs simply melts away in your mouth! My boys found them so addictive that they couldn't help popping one after another into their mouths.


Since there are so many recipes on my to-do list, I usually do not go back to the same recipe again too soon. These cookies are so good and so simple to prepare, I was addicted to baking them. I made another batch again two days later, but this time I mixed in 1 teaspoon of matcha green tea powder to half of the dough,


and 1 tablespoon of unsweetened cocoa powder to the other half. I made the doughs much smaller so that my boys could easily pop them into their mouth without leaving crumbs all over. The dough was easier to shape due to the 'drying effect' of the matcha powder and the chocolate dough was also quite dry as I have added too much cocoa powder.


As suspected, the chocolate cookies tasted bitter...would have to cut down the cocoa powder or use more icing sugar if I were to make these again. I paired them with a cup of slightly bitter coffee, and they didn't taste that bad...what to do, no one wants to eat these chocolate ones :'(


These matcha morsels are pretty nice with just a hint of matcha flavour lingering on the background. Nevertheless, my boys still prefer the plain, vanilla ones.


I packed some for my cake friend, and carried it with the greatest amount of care during the journey. However, just before I gave it away, I dropped the whole bag and the cookies were all crusted. I was so devastated and there was no one to blame but myself! Anyway, I was feeling very thick-skinned that day and went ahead to give it away. I couldn't imagine how my friend picked up the bits and pieces of cookie crumbs, lol! Fortunately, I learned later that she has actually made these cookies before, otherwise I would not have done justice to these delicious cookies.


Melt-in-mouth German Cookies 德式酥饼

Ingredients
(makes 60 pieces)

125g butter, soften at room temperature
40g icing sugar, sifted
1 teaspoon vanilla extract (optional)
125g potato starch
80g cake flour

Method
  1. In a mixing bowl, beat butter and icing sugar till light and fluffy. Add in vanilla extract (if using) and mix well.
  2. Sift in potato starch and cake flour. With a spatula, mix to form a soft dough. Note: if the mixture appears too soft and wet to shape, leave the dough to chill in the fridge for about 10-15mins .
  3. Roll dough into small balls (about 2cm in diameter), arrange on lined baking pan and press lightly with a fork (dip the fork in water after each press to prevent cookie dough from sticking to the fork).
  4. Bake in preheated oven at 170 deg C for 15 mins, upper rack (need not bake till cookies turn brown).
Recipe source: adapted from Small Small Baker

Jumat, 12 Februari 2010

A Box of Roses

I have been extra slow in baking cookies for this festive season. Partly because I  didn't have any intention to make any cookies, and partly I guess age is really catching up on me. I had to rest my stiff neck and shoulders for 2 days after spending one whole morning making pineapple tarts.  My eye-sight is also failing, my presbyopia is getting worst...it is getting  difficult and tiring to focus on objects up close. So I stopped baking and did some spring cleaning instead.


Early this morning, after spending 9 minutes on a 1-km jog around the estate (I know, I am extremely slow!), I felt all charged up and I found myself spending the rest of the morning baking two batches of butter cookies...rolled and piped ones.

I worked on the piped cookies first as I was feeling excited at the thought of piping cookies...this is something I have not done before. The recipe is straight forward and down right simple...requires minimum ingredients and the dough was done in no time. The only difficult part was piping them! I thought I could use my Wilton 2D decorating tip as it gives very impressive rosettes just like this one I did. To my dismay, the tip is not suitable for piping the cookies, the dough which pass through the gaps on the tip was just too thin. Fortunately I have another huge star tip, a Wilton 1C, this one worked quite well. Although I was able to pipe decent looking rosettes they are nothing close to what I had in mind. I can only blame my lack of skill. I am quite hopeless at piping...I do not know the  right technique to position the tip and I am totally clueless how to create a nice swirl?! I though it would be easier to pipe pretty swirls with a cookie dough since it is firm, but I was wrong :'(


These piped cookies are also commonly known as Melting Moments. As the name implies, they literally melts in your mouth. The dough is made by the creaming method, that is, creaming butter with icing sugar to give a soft and crumbly texture. Icing sugar is used instead of caster sugar to prevent the cookies from spreading. Although the finer the sugar granules, the more spreading they cause, icing sugar which contains cornstarch will actually help the cookies to hold their shape better. Corn flour is also used alongside plain flour  to create the tender, melt-in-your-mouth texture.

These delicate butter cookies are a great treat! I like the simple flavour...butter and vanilla. I am glad I did the right thing of stocking up blocks of Lurpark unsalted butter when it was on sale ;) The Nielsen-Massey Madagascar Bourbon pure vanilla extract lends the cookies a full and rich vanilla flavour. My only regrets, I should have added vanilla paste instead ^_^'


Melting Moments

Ingredients
175g unsalted butter, softened at room temperature
40g icing sugar
1/2 teaspoon pure vanilla extract
175g plain flour
40g cornflour (cornstarch)

Method:
  1. With an electric mixer, cream butter and icing sugar together until pale and fluffy. Add the vanilla extract and beat for a few seconds.
  2. Sift the flour and cornflour together over the butter mixture and mix until smooth.
  3. Spoon the mixture into a piping bag fitted with a large star-shaped piping nozzle. Pipe into the required shapes on a baking tray lined with parchment paper. Space the shapes well apart.
  4. Bake the cookies in preheated oven at 180degC for 12 minutes or until they are a pale golden colour. Leave for a few minutes on the baking tray to firm up slightly before transferring to wire rack to cool.
Recipe Source: The Cookie and Biscuit Bible

Note: To prevent the cookies from spreading and hold the shape better, after piping, chill the tray of unbaked cookies in the fridge for about 30mins before baking.

Rabu, 10 Februari 2010

It's the time of the year...

I thought I would not be baking any cookies for this coming lunar new year. There is just so much work involved. I only enjoy 'making' the cookies but not the cleaning up. Since no one ever expects me to bake anything for them, I thought I would give this annual baking ritual a miss this year. To my surprise, two weeks ago, my niece asked me when I am going to start my Chinese near year baking. She missed those horlicks doggies cookies, and won't mind if I make her some butter cookies too. Then, my younger child reminded me that he is the only person who gets to glaze those those peanut cookies with egg wash. And so, I started baking some horlicks cookies, and a batch of peanut cookies. Very soon I found myself slogging away again...wrapping tiny pieces of dough with pineapple jam in my kitchen!


This is my second year into baking these pineapple tarts, and I am proud to announce that this time I made them with homemade pineapple jam :D

I told myself if I were to make pineapple tarts again I will really have to cook the jam from scratch. The comment I got from my siblings last year was that even though the pastry was very close to what our mother used to make, the store-bought jam just couldn't replace homemade ones, which they feel has got more 'bite'.

I was terrified at the thought of cooking the pineapple jam for hours over the stove, even cutting and slicing the pineapple was a great hurdle that I wasn't quite ready to overcome. So I bought One ready-cut pineapple...with skin and eyes all removed to try ;)

Once I got home with the pineapple, I cut it into slices, grated and drained most of the juice away (it went into my stomach!). According to my family recipe, the pineapples are to be cooked with just some rock sugar and caster sugar. Most recipes I came across would recommend cooking it with cinnamon. I doubt my children would like the flavour so I stick to just sugar. However, in order to give the jam a nice golden hue, I used a mixture of brown and white sugar. If only white sugar is used, the colour would be too light, giving the impression that the jam is sour. To my great surprise, cooking the jam was not that tedious after all! Maybe it was because of the small quantity, I spent only about 45mins to cook the jam before it dried up and became sticky.


These golden gems are truly labour of love!

After my successful attempt at making my first batch of jam, I bought another two pineapples to make another batch. This time I really did it from scratch! No more cheating by using ready-cut fruits. I spent quite sometime trying to slice away the numerous eyes on the pineapples. Then it was another daunting task grating the pineapples. In the process, I grated not just the pineapples but also my fingers too!


I made tangerine-style pineapple tarts (my favourite!) and also tried shaping them into pillows. I wasn't quite sure how to go about it, so I simply rolled them in between my hands. The resulting tarts look more like cocoon than pillows! I then realised it was due to the shape of my palms and fingers. So I tried rolling it on my table and it worked! I went back to the same pineapple tart recipe but this time, I added in 30g of icing sugar. The original recipe has got no sugar in it, and I had a hard time judging whether the tarts were done. The pastry just wouldn't brown and I kept extending the baking time as I thought my unreliable oven was playing tricks on me again. Well, even with this extra sugar, the tarts didn't brown that much either :(

Feeling a bit more adventurous after having gained the confidence of making homemade pineapple jam, I ventured into something even more challenging...


...making Nastar rolls. With a cookie press, the dough is piped into a strip before wrapping it with the pineapple filling. I tried piping the dough on the table but the strip kept breaking. Fortunately I found a way that worked well for me...I piped the strip of dough directly onto my palm, place a pre-rolled pineapple gem on it and roll it over. I don't know whether it is the cookie press or the dough, the resulting nastar rolls look like sotong (squid)!!


The pastry was so fragile that I gave up glazing the rolls with egg wash. Even though these nastar rolls are not quite close to what they should be, it was certainly a good experience shaping them.


Once you sink your teeth into one of these golden morsels, the buttery pastry will crumble away in your mouth before hitting the soft, moist and delicious pineapple filling. They are so delicious that I have to keep a close guard on them otherwise they would be all gone before the new year eve!


Note:
* Hop over here for the tart pastry recipe. I added 30g icing sugar for this latest batch.
* Pineapple jam - I cooked 2 pineapples (grated and drained) with 150g brown sugar and 150g caster sugar (adjust sugar amount according to taste and sweetness of the pineapples). Add sugar only when most of the moisture has evaporated. Once sugar is added, keep stiring constantly to prevent burning. It takes about 30-45 mins on medium to low heat before the jam becomes dry and sticky. Leave to cool before storing in fridge. Roll into small balls.
* For closed type of tarts, I use half a tablespoon of pastry dough and 1 teaspoon of pineapple jam. Watch this video to learn the method to wrap the tarts.
* If the jam is too soft (under cooked), it will be difficult to wrap. To overcome this problem, freeze the rolled jam balls in the freezer for about 30mins (or longer) before wrapping.

Rabu, 21 Januari 2009

A Taste of Yesteryear

Just like the past couple of years, weeks before the Chinese lunar new year, I started looking up recipes to bake for the occasion. I have in mind to make some peanut cookies, kueh bangkits and my kids' favourite horlicks doogies cookies.

Pineapple tarts are never on my to-do list. Every year, I let it pass, as the thought of making the pineapple jam from scratch really, really puts me off. I am never good at anything that has got to do with the stove...and the homemade jam will easily take 2 hours of non-stop stirring and cooking, not forgetting the effort and time spent on cutting up fresh pineapples and grating them. Phew!


Things started to change after reading Small Small Baker's post on 'Looking for Pineapple Tart Recipes'. Then, after some exchange of emails with fellow blogger pals, Elyn and Yuri, I was convinced that ready-made jams are actually not too bad. At least I could try my hands with making the pastry and if it didn't turn out well, the effort spent on making the jam would not be gone to waste. After reading up reviews on the various store-bought jams, I narrowed down my choice to this brand "Bake King". Next, it was another daunting task to look for the 'right' recipe to make the pastry. There are so many types of recipes available...they look rather similar, and yet there are little differences...be it the amount of ingredients, or the little extras such as custard powder, milk powder, etc. To make things even more confusing to me, there is this Rub-in method vs Creaming method; and whether the recipes would yield crispy tarts or melt-in-the-mouth pastry! Finally (actually this is still not the final decision), I almost settled on this stack of recipes which I have photocopied long time ago...they were taken from the Female magazine, the January 1998 issue.

Well, The story didn't just end here. Somehow, by chance, while discussing with my siblings, what are the dishes to prepare for our CNY dinner, I got hold of our very old pile of recipes. You know, those old recipes that were handwritten in old exercise books? I got hold of two of them...and one of those booklets was my personal copy. I have copied down some recipes in an old note book (the first few pages were my school notes...my 3rd year subjects on 'Dynamics of Machines'!), and the recipes were dated January 1994, I bet that was the last time I wrote anything on that note book.

These old recipes have brought back so much fond memories of those yesteryear when we would help mum with all the Chinese New Year baking...be it kueh bangkit, pineapple tarts, butter cookies, kok-chai...spending hours painstakingly making them from scratch. During that few nostalgic moments, I decided that I should make it a challenge to recreate the taste of those goodies we made in the past. The top on the list is our pineapple tart recipe.


This is my first attempt at making pineapple tarts after a very long break, it was almost two decades ago since I last made them. I have only a very vague memory what was involved. After spending three hours on these cookies, they didn't taste as good as they look. I could have over baked them, causing the jam to turn hard and dry. The pastry was also too crispy...well, they were nothing close to those we had.


Fortunately, I also made these closed type of pineapple tarts. I have never made them before, as in the past, all pineapple tarts were the open-type. Since the jam was wrapped inside the dough, it was kept moist and I have also shorten the baking time.


After consulting my baking pal, Elyn, I made the second batch yesterday. Thanks to her tips, I omitted the egg white that was called for in the original recipe. This results in a much softer dough, no wonder, it was more difficult to cut out the dough with the mould as compared to the first trial. The resulting pastry was very soft, crumbly, very fragile and really melts-in-your-mouth. Half way packing the finished cookies into a container, I accidentally knocked if off! I ended up with tarts on the floor, piles of crumbles and the tarts were beyond recognition...if you have also spent hours making these, you will know why I was almost in tears :'(

To tackle the issue of dried jam, I rolled the jam into small balls with a pair of wet hands. I then placed them on a tray which was filled with a small amount of water. The purpose was to let the jam soak up some extra moisture to prevent it from drying during baking. I also experimented with baking the tarts for 10 mins before adding the jam. After which I let them bake for another 10mins. This time, the jam remains soft after baking!


With proper planning, I could even make those signature criss-cross patterns. I am very happy with this batch of pineapple tarts. They are much much better than those from the first trial. Even for those closed type, I was able to wrap the same amount of jam with less dough. Although the taste of the ready-made jam is acceptable, I really hope I will be able to make my own homemade jam next year. Until then, this is the closest I could recreate the delightful taste from our nostalgic recipes. Thank you for spending your time to read this very much long winded post :)


Pineapple Tarts (refer here for updated recipe)

Ingredients
(portion is enough to make 55 open and 20 closed tarts)

8oz (227g) butter, soften at room temperature
2 egg yolks, lightly beaten
1 teaspoon vanilla essence
14oz (396g) plain flour
1/2 teaspoon salt

Method
  1. With an electric mixer, on medium speed, cream butter till the mixture turns pale. Add in the vanilla essence and whisk to combine.
  2. Dribble in the egg yolks and continue to whisk the mixture till fully incorporated.
  3. Sift in the flour and salt into the mixture. Mix the mixture with your hand and gather to form a rough dough. Transfer to a work surface and lightly knead the dough for about 5 minutes until the dough becomes smooth.
  4. Wrap the dough with cling wrap and chill in the fridge for about 30mins. (This will prevent the dough from spreading, and makes it easier to handle.)
  5. Mean while, roll ready-made pineapple jam into small balls, about 1 teaspoon each. To measure the amount of pineapple jam, place a small sheet of cling wrap/plastic sheet over a measuring spoon (1 teaspoon), pack it with the jam to the brim and release with the cling wrap. (To prevent the ready-made jam from drying out during baking, roll the jam with wet hands. Wet your hands when they become dry after some rolling. Place the pineapple balls on a plate/tray filled with some water, just enough for the base of the balls to touch the water. This will allow the jam to soften and soak up some moisture.)
  6. Remove dough from fridge. Roll out dough on a lightly floured surface to about 5~7mm thick. (To prevent dough from sticking to the rolling pin, place a plastic sheet or a sheet of parchment paper over the dough before rolling.)
  7. Cut out the dough with the tart mould and transfer to baking tray, lined with parchment paper. (To get very clear imprints, place both the outer ring and the inner piece of the mould on the roll out dough. Press the outer ring into the dough then push down the inner piece with some force. Lift up the mould and carefully remove the cut out dough which is stuck to the mould. Dust the mould with flour regularly for easy release.)
  8. Bake in the middle rack position, at 180 degC for 10 mins. Remove from oven and place pineapple paste on each tart base. To decorate, you can either top it with a tiny ball of dough or cut out thin strips of dough and lay over the top of the pineapple paste.
  9. Return to oven and continue to bake for another 5 ~ 10mins. Leave to cool on baking tray for a few minutes before transferring to wire rack. Let cool before storing in air-tight containers.