Rabu, 20 Juli 2011

piling on the pound

I used to like Sara Lee's pound cake...simply love it especially served chilled right out from the fridge. I was even guilty of eating slices of it topped generously with whipped cream. It was never a rare sight to catch me enjoying a slice with a big scoop of ice cream. Thank goodness, those were the days when my body was young enough that I did not accumulate all those fat on my waist!

My eating habits changed since I started cooking and baking. I no longer crave for sara lee after I realised how much fat and sugar goes into the making of a pound cake. The traditional way of making a pound cake will use 1 pound each of the four basic ingredients - butter, sugar, eggs and flour. You will need almost 2 blocks of butter, more than 2 cups of sugar, 8 large eggs and at least 3 cups of flour just to make a pound cake. While there are healthier versions around, most pound cake recipes till use these same ingredients ratios of 1:1:1:1.


I will usually choose to bake a chiffon cake over a pound cake. However, I got interested in making pound cakes after reading through this book '欧陆点心&磅蛋糕'...one of the many new books I borrowed from the library recently. A few months ago, I attempted to make a matcha pound cake for my cake friend. But, the cake tasted dry and sandy. I didn't know what went wrong and could only point my finger at the 'drying-effect' of the matcha powder. Whenever I am bothered with a baking issue that I can't seem to be able to find an answer, the only thing I could do is to try and try again. That led me to another unsuccessful attempt at making a walnut streusel loaf cake. The cake tasted dry and gritty in  the mouth ;'(

It was only after reading the book that I discovered my mistakes. First, on both attempts, the batter started to curdle when I added too much eggs at one go. No problem, I thought, by adding one tablespoon of flour, the problem was solved. This happened at least twice while I was preparing the batter. Little did I know that this will actually cause the texture of the cake to be hard and dry!

Besides the dry texture, I also had problem with pound cakes not rising well above the rim. The problem lies at the folding of the flour into the batter. I have long since developed the habit of stopping when the flour has just incorporated into the batter. This book, however, recommends to continue to fold the mixture until the batter appears smooth and glossy. This method will increase the gluten formation in the flour, and as a result, the cake will rise and expand beautifully upon baking, and yet produce a cake that is soft, tender and moist.


With the newly acquired knowledge, I set off to bake another pound cake. I have wanted to try the walnut streusel cake again, but since I have some bananas on hand, I combined it with another banana pound cake recipe and out from my oven is this Banana Walnut Streusel pound cake :)


Just like to share with you this interesting method of topping the streusel on the cake. Instead of making the streusel into crumbs, the ingredients are mixed to form a dough and left to chill in the fridge. When ready, the streusel dough is then grated over the top of the batter. The dough works well in the beginning, but with my warm hand and the heat, it started to soften halfway before I was done...making it more and more difficult to grate. The next time I were to make this, I will divide the dough into two, using one at a time while the one remains chilled in the fridge.


The finished cake proves to be soft and moist. Not sure whether it is due to the method or simply because of the bananas??


Nevertheless, the cake is indeed very delicious, not forgetting the banana-y fragrance and the nutty, buttery streusel toppings. I am glad that I have finally produced a decent pound cake, and will love to try a few more recipes, and also to experiment with two other different methods...ie the separate eggs method, and the one bowl method which calls for adding the butter into the flour mixture instead of the common creaming method.

As the saying goes...there is no end to learning! The only problem is, I need to look for people to share the pounds with me ;)


Banana Walnut Streusel Pound Cake

Ingredients
(makes a 18cmx8cmx6cm pound cake)

100g unsalted butter, room temperature
65g icing sugar, sieve
2 eggs, room temperature, lightly beaten
1 teaspoon vanilla extract
100g banana, mashed
125g cake flour
1 teaspoon baking powder

50g walnuts

streusel:
25g unsalted butter, room temperature
25g icing sugar, sieve
25g cake flour


Method:
  1. To make streusel, place butter, icing sugar and cake flour in a bowl. With a fork, mix together the ingredients to form a soft dough. Leave in the fridge to chill.

  2. Break walnuts into pieces, place in a baking tray and toast it in a preheated oven at 100degC for 10mins. Set aside to cool.

  3. Line pound cake pan (18cm x 8cm x 6cm) with baking paper, set aside. Sieve flour and baking powder together, set aside.

  4. Place butter in a mixing bowl. With a handheld electric mixer, beat the butter for a few seconds on medium speed. Add half of the icing sugar and continue to beat till the sugar is incorporated into the butter mixture. Add the remaining half of the icing sugar and continue to beat till the mixture turns pale, light and fluffy.

  5. Dribble in the eggs gradually, about 1 tablespoon at a time, each time beat at low speed till incorporated into the mixture before adding. This step is important to prevent the batter from curdling. Even though some flour can be added to the batter to stop it from curdling, the texture of the cake will be affected. (Note: always use room temperature eggs to prevent curdling.)

  6. Add in the vanilla extract and the mashed banana. Fold with a spatula till just incorporated. Do not over mix as it may cause the batter to curdle.

  7. Sieve over the flour and baking powder mixture. Fold in the flour mixture with a spatula. Once the flour is incorporated into the batter, continue to fold for 1 to 2 mins until the batter appears smooth and glossy. This step is important so that gluten in the flour will be formed which will help the cake to rise and expand during baking.

  8. Pour finished batter into prepared pan. Spread batter and smooth top. Sprinkle the walnut pieces on top. Lightly press into the batter with spatula.

  9. Remove chilled streusel dough from fridge. Grate the dough over the top of the batter. Work quickly as the dough will soften very fast (especially on hot days).

  10. Bake in pre-heated oven at 170degC for 25 mins. Remove pan from oven and make a slit with a wet knife (dipped in water) across the middle. Return to oven and continue to bake for 35 - 40mins until a skewer inserted into the centre comes out clean, and the top is golden. Unmold and leave to cool completely. Store in air-tight container or wrap in cling wrap. Pound cakes are best eaten the next day.

Recipe source: 贝太厨房 and 欧陆点心&磅蛋糕

Rabu, 13 Juli 2011

Clearing the cobwebs

It's almost a month since I last updated this blog. I am feeling terribly guilty of neglecting 'this part of my life' that I fear my blog has already collected a thick layer of dust. I apologise for my tardiness, especially to all of you who have remained my loyal readers. I think it is time now for me to wipe off the dust and clear away all the cobwebs.

I wasn't really busy with anything over the past month. In fact I was rather 'inactive' if not for the usual household chores that kept me 'moving'. I could only blame it on the weather. Thanks to the poor design and layout of my house, I feel like I am living in a sauna :'( The heat and high humidity makes me feel so sluggish that I have no mood to do any baking. All I want is to go somewhere cold to hibernate than to sweat it out in the kitchen.


I can stop all baking activities but cooking is something I cannot avoid. I have never liked cooking since my cooking skills remains the same, that is, I am forever a novice. I am so tempted to eat out or opt for takeaways everyday, but, my conscience has prevented me from doing so. Nothing beats home cooked meals, even if it is something as simple as roast chicken.

I have been following this recipe whenever my boys craved for a roast chicken. Lately I got lazy, and relied on a new recipe which is so much easier and simple to prepare. Most importantly, the recipe always yields a crispy skinned roast chicken.


The key to the crunchy crisp skin is this secret ingredients...corn starch. What a valuable lesson I have learned from the Living Magazine! This is such a simple roast chicken that anyone can prepare. All you need to do is to wash and clean the whole chicken (believe it or not, this is a task that I took a while to pick up the courage to do!), pat it real dry, inside out, and rub some butter all over the skin, including under the skin. Butter will help the chicken to brown evenly. The next thing is to rub a combination of salt, pepper and corn starch all over the chicken, including the cavity and of course under the skin to add flavour to the meat. I like to add in some dried mixed herbs as I love the smell of the herbs when the chicken is roasting. It is perfectly all right to leave it out or you could do with some fresh rosemary (finely chopped). I don't truss the chicken as I don't know how to do it, plus, I think it is not an absolute must. The last step is to place it in a roasting pan (preferably one that comes with a rack, to encourage even browning) and leave it to the oven to the finish the job as it is not necessary to baste the chicken. In about an hour's time, you will be rewarded with a golden crispy chicken, not forgetting the inviting aroma of the roast chicken...I feel so proud for myself as I am very certain my neighbours could smell it and would probably think their neighbour must be a good cook!

I would usually baked some potatoes together with the chicken, but this time, I left them out, and served the chicken with some salad instead. I have also served the chicken with tortilla wraps, making it an interesting meal for my kids.

Besides the crispy skin, the meat is tender and juicy, even the chicken breast tastes good, soft and moist. This is mainly due to the ingredients used. The salt and corn starch will lock in the moisture as the chicken roasts. It is certainly a no-frills, no-fail and yet delicious meal that I would go back again and again. I am not so concerned about the fat, as most of the fat from the chicken melts and drips away during roasting. I am always amazed by the amount of oil that is collected in the roasting pan. It makes me think that a roast chicken is a much healthier choice than deep fried ones. Of course, the pan juice is best used to make a flavourful sauce out of it, but I have given up on it as I was too zealous trying to spoon off every single drop of fat that I was left with not much of juice to work with, lolz. 

I hope this post has help wiped off some dust, and I believe I will be back soon, and hopefully it will be something to do with baking.


Crisp-skinned Roast Chicken

Ingredients
1 medium-size chicken
1 teaspoon fine sea salt
1 teaspoon freshly grounded black pepper
1 teaspoon corn starch (also known as corn flour)
1 teaspoon dried mixed herbs (optional)
1 knob (about 1 tbs) unsalted butter, soften at room temperature

Method:

Combine salt, pepper, corn flour, mixed herbs (if using), set aside.

Wash, clean and pat the chicken dry (very dry) with paper towels all over, including the cavity. Rub the butter all over the chicken.  With fingertips, gently separate the skin from the meat of the chicken breast and rub some butter under the skin. Rub the seasoning mixture over the chicken and inside the cavity, and push some seasoning mixture under the skin.

Tuck the wings underneath the chicken and place it breast side up, on a roasting pan (preferably with a rack). Cook in preheated oven at 230 degC for around 10-15 mins then turn down to 200degC for around 40-45 minutes or until the skin is nicely browned. To test whether the chicken is done, pierce the tip of a knife near the joint between the drumstick and the thigh. The juices should run clear (not pink), if it is still pink, cook the chicken a little longer. Let the chicken rest for 15 minutes before serving. This allows the juices to settle and redistribute and the chicken will be much more succulent.

Recipe source: adapted from Living Magazine

Kamis, 16 Juni 2011

pandan cake...two way

I made two pandan cakes this week. The two ingredient lists were almost identical but the preparation method differs slightly.


I wouldn't call this a pandan chiffon cake. Although it was made using separate eggs method, the texture was closer to a sponge cake instead. The preparation method is slightly different from making a chiffon cake. To make this cake, the egg whites are first beaten still close to stiff peak. The yolks are then added directly to the meringue, followed by vegetable oil, coconut milk, vanilla extract and pandan paste...all dump in together. The mixture is then combined with a balloon whisk. The last step is to fold in the flour with a spatula. The cake is baked in a bundt pan or a tube pan...which has to be well greased and floured. After baking, the cake pan is inverted and the cake will slip off from the pan right away.


This pandan cake didn't rise too much upon baking. Either I have deflated the batter when trying to fold in the flour, or it could be due to the smaller sized eggs that I used...the cake pan was only half filled. I didn't do a good job in preparing the pan either...there was a thin layer of flour on the surface of the cake :(

Once the cake was released from the pan, I cut a slice to taste it. The crust is quite crisp and the crumb tasted moist and soft. The cake didn't taste as moist upon cooling but I still find it delicious.


With some left over coconut milk, I made another pandan cake...this time, it is a real chiffon cake. The cake rose quite well during baking despite the fact that I must have deflated the batter since the finished batter was not as thick as I would expect.


Closer to the end of the baking, the cake started to sink a little. Fortunately it managed to stay well above the rim upon cooling. I am quite satisfied with the height of the finished cake. I have deliberately omitted cream of tar tar and baking powder which are called for in the original recipe. Apparently this didn't cause any damage.


I really like the airy texture of this cake! It is cottony soft, moist, light and fluffy.  This recipe is certainly a keeper. The only thing I need to improve upon is to enhance the flavour. I have left out the pandan juice since I do not have a blender or a mortar and pestle to extract the juice from pandan leaves. I will have to think of a way to get around this problem before I could make the perfect pandan cake.

(I will be leaving for a short trip and will not be able to access blogger during the time I am away. You may leave your comments and questions and I will respond to them when I return.)


Pandan Chiffon Cake

Ingredients:
(for 7" tube pan)

3 egg yolks (use large eggs, 60g without shell)
35g caster sugar
70g coconut milk
55g vegetable oil
1 teaspoon vanilla extract
1/2 teaspoon pandan paste
1 tablespoon pandan juice  
pinch of salt
100g cake flour

4 egg whites (use large eggs, 60g without shell)
50g caster sugar
(Note: I omitted the baking powder and cream of tar tar which is called for in the original recipe.)


Method:
  1. Sieve flour and set aside.
  2. Place egg yolks in a mixing bowl. With a manual hand whisk, whisk the yolks a little. Add in sugar and whisk till the mixture turns pale and thick. Add coconut milk gradually, stir to combine. Add vegetable oil gradually, stir to combine. Add vanilla extract, pandan paste, pandan juice (I replaced with water) and salt. Stir to combine. Sieve over the flour and whisk till the flour is fully incorporated. Do not over mix. Set aside.
  3. In a clean, dry mixing bowl, beat egg whites with a handheld electric mixer on low speed until mixture becomes frothy and foamy.  Add half of the sugar amount and turn to high speed and beat the mixture. Continue to add in the remaining sugar and beat until the egg whites reaches the soft peak stage.The soft peak stage is reached when the peaks of the whites curl over and droop slightly. The egg whites should appear smooth and glossy. (Do not over beat the whites still stiff, it is better to beat the whites still soft peaks for easy folding with the yolk batter.)
  4. Add the beaten egg white into the egg yolk batter in 3 separate additions, each time folding gently with a spatula until just blended.
  5. Pour batter into a 17cm tube pan (do not grease the pan). Tap the pan lightly on a table top to get rid of any trapped air bubbles in the batter.
  6. Bake in pre-heated oven at 170 degC for 35 mins, or until a toothpick inserted into the centre comes out clean, when lightly pressed the cake will spring back. Invert the pan immediately and let cool completely before unmould. To remove the cake from the pan, run a thin-bladed knife around the inside of the pan and the center core. Release the cake and run the knife along the base of the pan to remove the cake.
Recipe source: adapted from ieatishootipost

Kamis, 09 Juni 2011

baking for a friend

This is a much delayed post...exactly two weeks late, pardon my tardiness!

I thought I could manage to squeeze in sometime to update my blog before we left for a short trip to Malaysia. Alas, I was so tight up with booking the accommodations, drawing up the itinerary, looking up google maps for addresses for places of interest and ploughing through websites and blogs to hunt down famous eating places along our drive up to Penang. I couldn't post this up soon after we were back home as I was busy cleaning up the house and washing and ironing loads after loads of laundry :(

Back to the theme of this post...


I have in mind to bake this classic chocolate torte for my cake friend just before the end of the school term. I thought it would be a good way for her to celebrate the start of the school holidays with her children. I was quite confident that even the most picky eater would not be able to reject a slice of chocolate cake :)


So far this is the 'safest', almost fool-proof cake for me to bake and give away.

The ingredients are simple enough...they are items that are easily retrieved from most home bakers' pantries.

The preparation method is almost similar to baking a chiffon cake...the only difference is, this cake is baked using a normal round cake pan.

There is no worry about the cake not rising tall and mighty in the oven, what we really want to achieve is a dense, sunken and cracked cake!

There is no frosting required to decorate the cake. Just a simple light dusting of icing sugar does the trick.

Even though I have not made this cake for ages, I was very satisfied with the result...at least it was something that I wasn't too shy to give away, especially to a fellow home baker.

This time I managed to deliver the cake in one piece :)
It was indeed a delight to hear that my cake friend liked it, and to top if off, this is the exact same cake which brought her to my blog. She was wondering why someone would blog about a cracked and sunken cake (^^''')


After hearing from my friend how the texture of the cake turned out...smooth and soft...just the way it should be, I couldn't resist the temptation and went on to bake another one a few days later. This time it was for my husband when he came home to spend a week with us.

This second cake appeared to crack more than the previous one even though I didn't do anything different. The cake produced a nice dome while baking in the oven. Towards the end of the baking time, it started to sink. Upon cooling, the cake collapsed further forming a very sunken centre and kinked sides.


Don't be deceived by its ugly appearance...the cake was wonderfully moist and chocolatey. However, I must alert those with sweet tooth...the semi-sweet dark chocolates, with at least 60% cocoa content, plus the unsweetened cocoa powder I used, made this cake tasted a little bitter. But for those who prefer dark chocolates to milk chocolates, this is the cake to make whenever you crave for something with a very intense chocolate taste.


Although the cake looks dense and 'kueh-like', the texture is actually very smooth and soft, almost like eating a slice of cheesecake. I attribute the soft and fine crumbs to the minimal flour used in the recipe. This cake is best eaten at room temperature and as with most chocolate cakes, the cake tastes even better when left overnight. I have planned to submit this post for the last Aspiring Bakers event, but I didn't manage to meet the deadline, hope I am able to participate in the next round.


Classic Chocolate Torte

Ingredients:
(make one 18cm cake)

150g dark chocolate
100g unsalted butter
3 egg yolks
20g caster sugar
30g cake flour
15g cocoa powder

3 egg whites
50g caster sugar

icing sugar for dusting


Method:
  1. Preheat oven to 170 degC. Line the bottom of an 18cm round pan (with removable base) with parchment paper. Grease and flour the sides. Separate egg whites from egg yolks when the eggs are still cold from the fridge. (It's easier to separate eggs while they are cold). Sift together flour and cocoa powder, twice, set aside.
  2. Melt dark chocolate and butter in a bowl over a pan of simmering water (make sure the bowl is able to sit above the water and it should cover the pot so that steam will not get inside the bowl). Remove from heat. Let cool.
  3. With a manual whisk, whisk egg yolks with 20g of the caster sugar, till the mixture turns pale, becomes thick and creamy. Add in the melted chocolate/butter mixture. Whisk till well mixed. Add in flour mixture and fold gently with a spatula. Set aside.
  4. In a clean, dry mixing bowl, beat egg whites with a handheld electric mixer on low speed until mixture becomes frothy and foamy.  Add half of the sugar amount and turn to high speed and beat the mixture. Continue to add in the remaining sugar and beat until the egg whites reaches the soft peak stage.The soft peak stage is reached when the peaks of the whites curl over and droop slightly. The egg whites should appear smooth and glossy. (Do not over beat the whites still stiff, it is better to beat the whites still soft peaks for easy folding with the yolk batter.)
  5. Add the egg white to the egg yolk mixture in three addition. Each time, fold in gently with a spatula, making sure all the egg whites are incorporated into the batter. Note that any unmixed egg white lumps may cause holes in the final product.
  6. Pour batter into the prepared cake pan. Tap the cake pan slightly on tabletop a few times to release any trapped bubbles in the batter. Bake at 170 degC for 30 ~ 35 mins, or until a skewer inserted into the centre comes out with a few moist crumb. The cake surface will start to crack while still in the oven.
  7. Remove cake from oven, leave it in the pan for about 5mins. Unmould and let cool, right side up (do not invert) on wire rack. The cake is best eaten at room temperature. If stored in fridge, bring the cake to room temperature before serving.
Recipe source: adapted from Delicious!! Baked Cakes

Rabu, 25 Mei 2011

Journey down the baking trail: Cookies

I am moving an inch at a time on my baking trail. I have not been baking much for the past few weeks...was busy catching up with things that I have left behind...like watching tv drama and keeping up with the household chores.


I have been wanting to make these melt-in-the-mouth German cookies when I first saw it at my baking pal, Sherlyn's blog. I bought the bag of potato starch weeks ago, but it was on a spurt of the moment that I decided to bake them...even though I was recovering from a fever. My younger son as usual, was always keen and eager to help me with baking, and lately he is into cooking. I have to thank him for being a very caring child. Besides gladly playing nurse, he was very spontaneous in helping out with simple chores when I was sick.

It was a hot and humid evening when we went about whisking the butter and the sugar. After adding the flour mixture, we couldn't really form a dough...the mixture was still batter-like instead of doughy. I was certain that I didn't get the measurement wrong. The only thing I could pin-point was the additional one teaspoon of vanilla extract I added in. It could also be due to the weather, the room temperature was 31.5 degC...the butter was already very soft to the extend of appearing greasy when I was done with the mise en place...and there was nothing much to prepare since there were only 4 ingredients!

I decided to let the dough chill in the fridge and it was a good thing I did. We could finally form the mixture into cookie doughs. Due to the extreme heat, the dough started to soften as we continued to work them into small rounds. I was expecting the cookies to spread upon baking but all of them turn out well. The cookies were nicely baked...slightly pale on top but the bottoms were lightly browned. These delicate cookies certainly live up to the name...the buttery crumbs simply melts away in your mouth! My boys found them so addictive that they couldn't help popping one after another into their mouths.


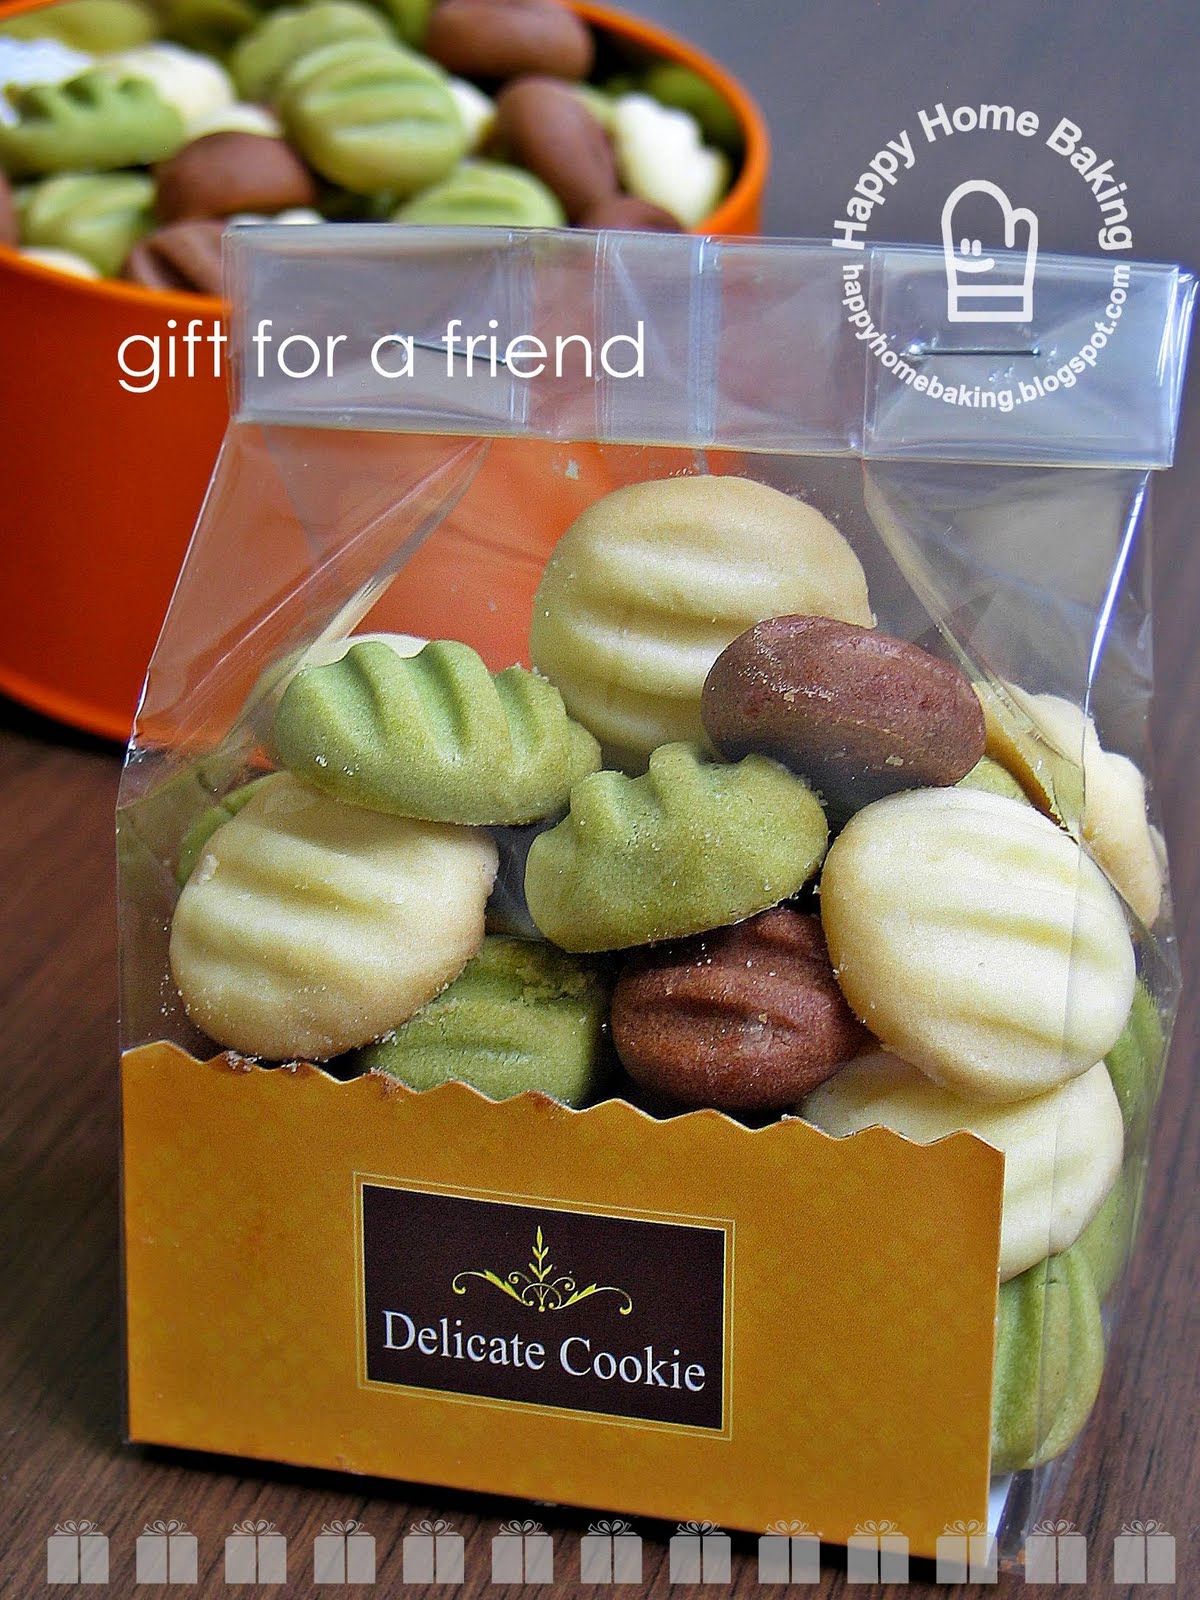
Since there are so many recipes on my to-do list, I usually do not go back to the same recipe again too soon. These cookies are so good and so simple to prepare, I was addicted to baking them. I made another batch again two days later, but this time I mixed in 1 teaspoon of matcha green tea powder to half of the dough,


and 1 tablespoon of unsweetened cocoa powder to the other half. I made the doughs much smaller so that my boys could easily pop them into their mouth without leaving crumbs all over. The dough was easier to shape due to the 'drying effect' of the matcha powder and the chocolate dough was also quite dry as I have added too much cocoa powder.


As suspected, the chocolate cookies tasted bitter...would have to cut down the cocoa powder or use more icing sugar if I were to make these again. I paired them with a cup of slightly bitter coffee, and they didn't taste that bad...what to do, no one wants to eat these chocolate ones :'(


These matcha morsels are pretty nice with just a hint of matcha flavour lingering on the background. Nevertheless, my boys still prefer the plain, vanilla ones.


I packed some for my cake friend, and carried it with the greatest amount of care during the journey. However, just before I gave it away, I dropped the whole bag and the cookies were all crusted. I was so devastated and there was no one to blame but myself! Anyway, I was feeling very thick-skinned that day and went ahead to give it away. I couldn't imagine how my friend picked up the bits and pieces of cookie crumbs, lol! Fortunately, I learned later that she has actually made these cookies before, otherwise I would not have done justice to these delicious cookies.


Melt-in-mouth German Cookies 德式酥饼

Ingredients
(makes 60 pieces)

125g butter, soften at room temperature
40g icing sugar, sifted
1 teaspoon vanilla extract (optional)
125g potato starch
80g cake flour

Method
  1. In a mixing bowl, beat butter and icing sugar till light and fluffy. Add in vanilla extract (if using) and mix well.
  2. Sift in potato starch and cake flour. With a spatula, mix to form a soft dough. Note: if the mixture appears too soft and wet to shape, leave the dough to chill in the fridge for about 10-15mins .
  3. Roll dough into small balls (about 2cm in diameter), arrange on lined baking pan and press lightly with a fork (dip the fork in water after each press to prevent cookie dough from sticking to the fork).
  4. Bake in preheated oven at 170 deg C for 15 mins, upper rack (need not bake till cookies turn brown).
Recipe source: adapted from Small Small Baker

Senin, 16 Mei 2011

Lost and Found...My blog post on '水正果 Sujeonggwa'

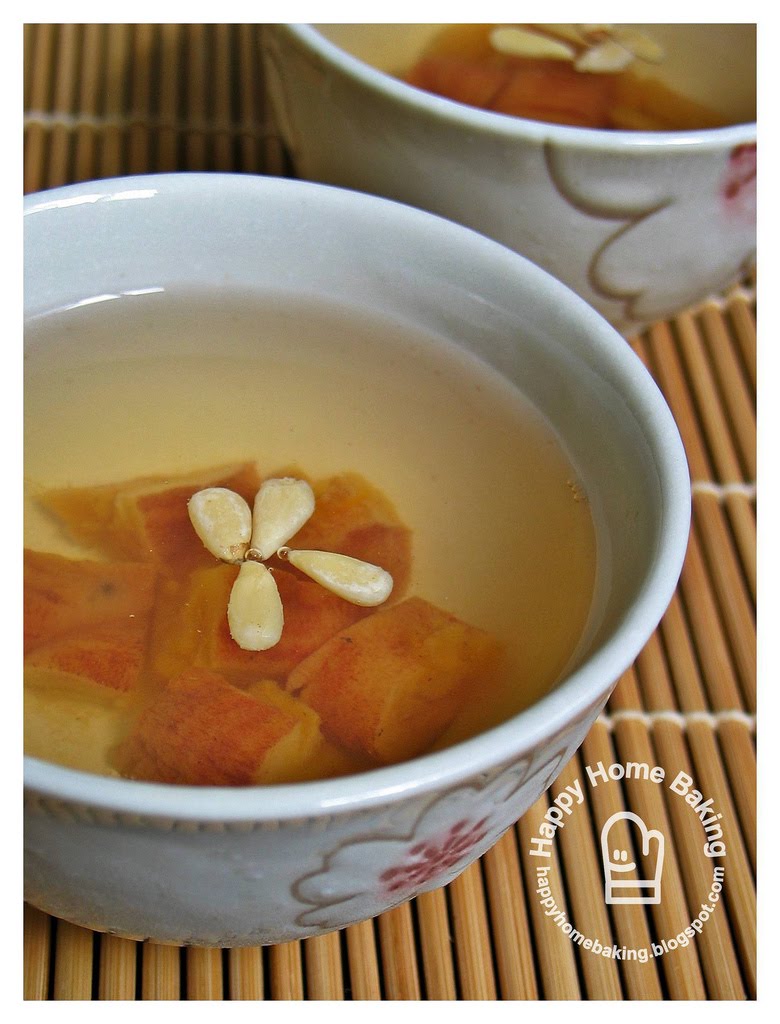
My latest blog post on Korean Sujeonggwa (Cinnamon Ginger Tea with dried persimmons) was gone missing after Blogger did a scheduled maintenance last Thursday. I noticed most of the regular blogs I visit do not have the problem of missing posts. I waited patiently for Blogger to restore everything but every time I checked my blog, the post was still not restored. For the past few days, I have been searching on the internet to see whether I am able to get around the problem. I did manage to find some possible solutions but it didnt work for me...I googled for the missing post and tried going to the cache link to retrieve it, but I didn't have luck. This morning, I googled again, and was happy to find another alternative solution. I managed to find the full post from 'Goolge Reader Feed'!

For those of you who have got missing posts, this was what I did: I was logged on to Blogger (which means I am signed in to my Google account), then I opened another new tab on my web browser. I searched using Google with key words "Goolge Reader Feed". I clicked on the first search result with the link: www.google.com/reader, and there right in front of me was all my recent blog posts. When I clicked on the link of my missing post, the entire blog post appeared, and I could copy and paste the text into a new post.

I am re-posting the blog post here as I treasure every blog post I wrote :)


当了两个星期的陪读妈妈,今天终于可以解脱了!

每当考试季节的来临也是意味着我恶梦的开始。万事起头难,通常我都得经过一番拉锯战,加上‘威逼’之下(我不用’利诱‘, 我是不吃这一套的),我家那两个少爷才会乖乖就范,专心备考。还好,值得欣慰的是,一旦定下心,不论大小都会全神惯注,专心温习那一大堆的课本和作业!他们的毅力有时真的令我很惊讶!在这么酷热的天气下他们还能精神奕奕,而我这个名副其实的陪读妈妈却半躺在一旁对着不停向我招手的周公直点头。

今年老大升上中一,我老早就和他讲明,他得自己保重,自己安排时间温习,不能再依靠老妈的督促。不过有时他还是把我当成他的活动字典和不用插电的’专用‘网络维基!外表愚钝(就是blur blur 那种lor),不善言辞的他,成绩不算优秀。去年经过那一轮艰辛的小六会考的历练,他总算领悟到一些读书心得,加上他还蛮勤奋,勤能补础,希望他中学的成绩不要太惨不忍睹。

把老大丢一旁,我的火力全集中在小宝贝的身上。吸收力蛮强的老二,能举一反三,陪他备考比较轻松。不过和哥哥相比,却显得粗心,毛躁,不够稳重淡定。我非常质疑他上课时到底有没有专心听讲?可是他又能把老师所教的都倒背如流,也能一一举出重点,有时还能做出结论或提出他的看法和见解。考试前夕,我在一边看着他那专注的神情,不禁对他有一丝的刮目相看,小不点好像长大了!看他那副充满自信的样子,我之前的焦虑也跟着一扫而空。

这几天,为了解热,我不是煮薏米水就是菊花茶。好想来一杯自制冰凉的韩国茶--水正果! 可是市面上已经找不到韩式柿饼(柿饼就是晒干的柿子,韩式柿饼是半干的),我又不想用 made in China 的。。。所以现在只能望梅止渴lor。。。


水正果是一种韩国传统甜点饮料。它是用生姜、桂皮和水一起滚煮然后加糖调味,放凉后,加入柿饼泡上几小时冷冻后饮用。饮用前把柿饼切块再撒几颗松子仁在饮料上。比较讲究的吃法还会把核桃包入柿饼切块后配饮料一起享用。生姜、桂皮、柿饼和松子仁都有个自独特的功效,把这些凑在一起作成的水正果据说具有预防感冒的疗效呢!

水正果有点微辣又有甜味,非常生津止渴。尤其喉咙干痒时喝下一杯,感觉真的很爽。为了不要口感太辣,桂皮我没煮太久,而且我用冰糖(多数食谱都用红糖)所以我的水正果茶颜色比较淡没那么深褐色。想学如何煮一锅水正果茶可以查看这个 video clip (从03:20分开始) 或这个和这个食谱。希望你会和我一样喜欢这个饮品。


Thanks to VB, my cyberfriend, I was introduced to Sujeonggwa, a type of Korean cinnamon ginger tea with dried persimmons. It is a delicious beverage and very refreshing especially when served chilled. This tea is made by simmering cinnamon and ginger with sugar added to sweeten it. Upon cooling, dried persimmons are then added and left to soak for a couple of hours. The drink is usually served with the persimmons and some pine nuts as garnish. Hop over to this video clip(starting from 03:20min) or this video by Maangchi if you are interested to learn how to prepare this drink.


Su jeong gwa

Ingredients:

50g ginger, peeled and sliced thinly
2 litres (8 cups) of water
30g cinnamon sticks (about 5 to 6 sticks)
some rock sugar, adjust to taste (original recipe calls for 175g brown sugar)
3 dried persimmons
some pine nuts


Method:
  • Place ginger and water in a pot or a large saucepan. Bring to a boil. Turn to low heat and let it simmer for 20-30mins.

  • Rinse cinnamon sticks and add to the mixture. Return the mixture to a boil and remove from heat. (Note: I let it simmer for about 5mins.)

  • Strain the mixture through a fine sieve. Discard ginger and cinnamon sticks. Return the mixture back to the pot, add the sugar and bring it to the boil. When sugar is dissolved, remove from heat and leave to cool.

  • Wash the dried persimmons, remove the calyx and add to the cooled mixture. Leave to chill in the fridge for at least 2 hours.

  • Remove persimmons from the mixture and cut into bite size. Serve the drink with the persimmons and some pine nuts as garnish.

Recipe source: adapted from Step by Step Cooking Korean: Delightful Ideas for Everyday Meals by Lee Min Jung

Selasa, 03 Mei 2011

of Birthdays and Baking


It is the time of the year again...

when I am 365 days older...but not necessary wiser....

when I just have to make a cake for myself, not because I love baking so much...but it seems like the only right thing to do...

when I always begin the day with the wrong mood, usually with a hint of resentment...but always went to bed all soaked up in a sweet feeling...


Before I share with you my birthday cake for this year, I will like to mark this occasion with a small roundup of the birthday cakes I have made so far...


My maiden birthday cake...a Dorie Greenspan's Devil's Food White-Out Chocolate Cake. Just like the Chinese saying "初生之犊不畏虎" which has the same meaning as 'fools rush in where angels fear to tread'...looking back, I was indeed a fool...trying to do something so challenging with the little baking knowledge and experience I have. It is no where close to the gorgeous cake on the front cover of Dorie Greenspan's 'Baking: From My Home to Yours'...what a disgrace to the author!


The following year, I celebrated my 40th year on earth with a dark, rich (how I wish it was someone tall, dark and handsome!) and very decadent Chocolate Gateau. It was a break through for me as it was the first time I tried piping rosettes with melted chocolate. I remembered trying so many times to produce the best looking rosette I could manage, that the chocolate started to harden and I had to give up when the fat appeared to separate from the cocoa, lolz!


One year later...having gone through enough baking failures, I attempted a Tiramisu Charlotte Cake that looked quite presentable with the clever 'cover ups'. The taste was so good that I wasn't afraid to make the same thing again for my close ones' birthdays.


This strawberry mousse cake seems to mark the beginning of my baking skills going down hill. I cringe whenever I am reminded by how 'coarse' the mouse layer was! The cake has also taught me to be more humble...that is, I have to treat all recipes with respect. I shouldn't play around with ingredients too much especially when dealing with delicate cakes.


pardon the lousy image...click on the picture to view a higher resolution image

This the latest edition to my list of birthday cakes...a no-bake Tofu Cheesecake. This time, I followed the recipe closely, the only deviation was, I used another recipe for the biscuit crust. Making the cake was smooth sailing...except having to run out at the last minute to get gelatine powder after a fruitless attempt rummaging through my cabinets of baking stuff. I popped the cake into the fridge to set before we went out for lunch. I had planned to get some fresh strawberries on our way back to make some berries sauce to go with the cake. Another lesson learned...do not take it for granted that your local supermarket would carry strawberries all year round. I couldn't find any strawberries, not a punnet on the shelf, neither could I find any suitable fruits to use as garnish. We went home empty handed, and I thought I was going to have a plain cake for birthday until I remembered I came across a marshmallow fondant recipe a few days ago. I was happy that the pack of coloured marshmallows sitting in my cabinet came in handy. I melted three pink marshmallows over a pot of simmering water, then added 40g of icing sugar (the sugar amount is double the weight of the marshmallows), and kneaded it into a small dough. I spent the next half an hour making fondant roses with my younger son...while the elder fellow kept stopping by to steal a piece of dough before popping it into his mouth.


pardon the lousy image...click on the picture to view a higher resolution image
Thanks to Bakertan for sharing this video on how to make a rose out of fondant. I saw the video sometime back, and based on what I could recall (I didnt even bother to watch the video again), I made the first rose. Since it was the first attempt, it wasn't that nice to be granted the lime-light spot in front. The second rose, facing right at the camera was pretty well done...at least for a first timer who has zero experience with fondant. Just like the video demo, I didnt use any tools, or roll out the dough evenly. I simply pinched pieces of dough, flatten it (without using any cling wrap since it is not sticky at all) into petals and stick them together into a rosette. The smaller rose on the left was done by my younger child. The petals were not as thin but I would think his motor skills is actually not too bad. Besides he has some 'prior experience' making a small rose with jumping clay, the day before. 

There were only enough marshmallow fondant to make 3 rosettes...and I placed them on top of my cheesecake right after they were made. To my surprise, the roses started to sweat due to condensation. It wasn't something I least expected even though I have read about 'sweating fondant' especially in our humid weather. It was quite heart breaking having to watch the pretty roses sweating away :'(


As usual, before we cut the cake, I was 'showered' with presents from my boys. I saw my little one making this tiny froggy the day before, they should know that they can't hide anything from me ;)  My elder son gave me something 'intangible'. A piece of music...the classic birthday song which he 're-arranged' with some music software...it was a string ensemble with 'violin', 'viola' and a 'cello' (I think?).


I managed to take a clearer picture of a slice of the tofu cheesecake the following morning. The cake was smooth and firm...not velvety soft as silken tofu. The texture wass closer to a firm tofu...probably because of the amount of gelatin used. It is an 'adult cake' actually...because it tasted quite tangy, thanks to the generous amount of lemon juice. My younger son only took a few mouthfuls before he scrapped off the filling and transferred it to his daddy's plate. He told me he liked the crust better, haha. The rest of us fell in love with the tanginess! The cake tasted so refreshing and delicious that we couldn't stop at just one slice...there were no tofu taste though. We had to caution each other of the amount of calories in order to refrain from taking the third piece. The only 'compliment' I got from my better half was...the crust was very professionally made...it didn't fall apart easily like all the previous no-bake cheesecakes I have made. What a great pat on the shoulder! As for the marshmallow fondant...it tasted great when dry...almost like eating a piece of 'crushed and flattened' cotton candy. However, after left to perspired profusely, the fondant rose tasted like...according to my elder son's description...as though eating a piece of '大白兔奶糖' (a kind of milk toffee)!

It was an experience playing with fondant...something which I never thought I will make because of the high sugar content. Although I am likely out of my mind if I were to make a cake covered fully with fondant, I won't dismiss the idea of making tiny edible cake toppers whenever I run out of idea to decorate a birthday cake ;)


Tofu Cheesecake

Ingredients
(makes one 18cm round cake)

crust:
95g digestive biscuits, finely crushed
50g unsalted butter, melted
1 tablespoon light brown sugar

filling:
6 tablespoons warm water
2 tablespoons gelatin powder
250g cream cheese, soften at room temperature
150g silken tofu
45g unsalted butter, soften at room temperature
5 tablespoons caster sugar
4 tablespoons lemon juice


Method:
Crust:
Line the base of a 18cm round pan (with removable base) with parchment paper. Combine crushed digestive biscuits, light brown sugar and melted butter together in a mixing bowl. With the back of a spoon, press the biscuit crumbs firmly onto the base of the prepared pan. Chill in the freezer compartment for at least 1 hour. (To ensure the crust is even, I used the base of a flat-bottom glass to press down the crumbs.)

Filling:
Measure warm water into a small bowl and sprinkle in the gelatin powder (without stirring). Set aside to allow the gelatin grains to bloom.

With an electric mixer, beat cream cheese, silken tofu and butter in a mixing bowl until smooth. Stop to scrape down the sides if necessary. Add in sugar and beat till fully incorporated. Add in lemon juice, beat till fully incorporated.

The gelatin should turn spongy by now. Stir the solution with a spoon. (Note: not all the gelatin powder was fully dissolved when I made this, but it was not a problem as the mixture was added to the cheese batter through a sieve). Pour the gelatin solution through a sieve into the cream cheese batter. Beat the batter till fully incorporated.  Stop to scrape down the sides when necessary. (The finished batter is rather thin and runny.)

Pour the batter onto the chilled crust based. Tap the pan lightly on table top or smooth the surface with a spatula.  Refrigerate until set (at least 4 hours).

To unmold, place pan on an inverted glass (or a canned drink or any canned food). Carefully slide the removable pan downwards to release the cake. Transfer cake together with the base to a serving plate.  Serve with fresh berries sauce.

Recipe source: adapted from Food & Travel magazine